Segments in MailerPress let you group your contacts based on shared characteristics, behaviors, or custom field values. Segmentation is useful because it allows you to send targeted, relevant emails rather than generic messages, improving engagement, open rates, and conversions.
By tailoring your campaigns to specific audience segments, you can deliver the right message to the right people at the right time.
MailerPress Pro is required to use the segmentation feature.
Create a segment
Sign in to your WordPress admin, go to MailerPress, Audience, Segmentation.
Click New segment button to display the modal.

Initialize your segment
The first step is to name your segment. Make sure it’s clear so it’s easier to find your way around.
The second step is to select an operator that will connect all your conditions:
- AND: All conditions must be met.
- OR: At least one condition must be met.
Add conditions to your segment
The last step is to add your conditions.
Choose a condition between:
- Created Date
- Custom Field
- Engagement Status
- Contact List
- Email Open Activity
- Total Purchases
- Subscription Status
- Contact Tag
- Updated Date
Next, choose an operator such as “is“, “is not“, “contains“, etc., depending on the condition selected.
Finally select the expected value of the condition: custom field name, list name and so on.
Repeat the operation to add additional conditions by clicking the dedicated button.
Click the Save segment button once you’re satisfied.
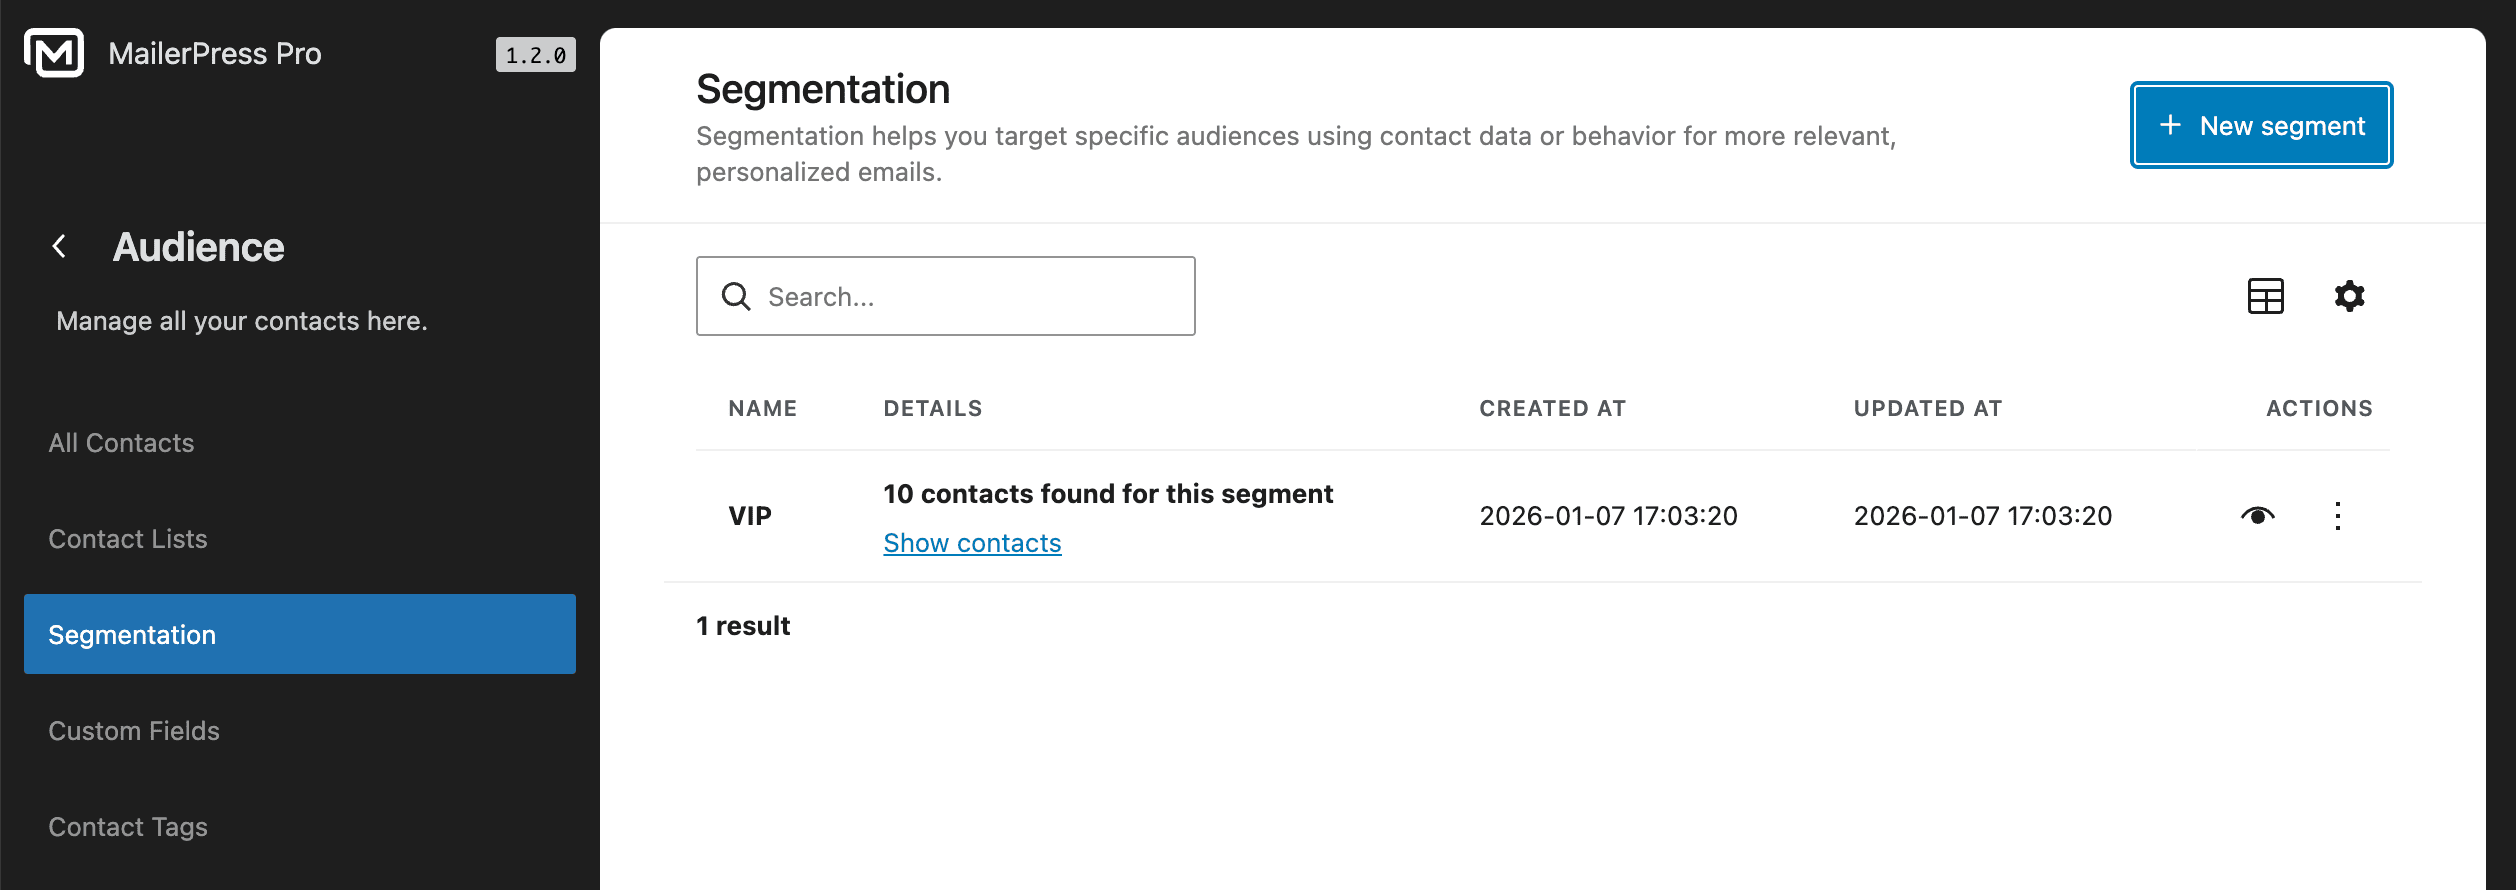
The new segment appears in the list. Click Show contacts to quickly see the associated contacts with your brand new segment.
Edit a segment
From the list of your segments, click the three dots icon under the actions column and click Edit.
Or simply click the View icon.
A modal will appear to change the conditions of your segment.
Make some changes and save them.
Delete a segment
To delete a segment, choose Delete from the dropdown.
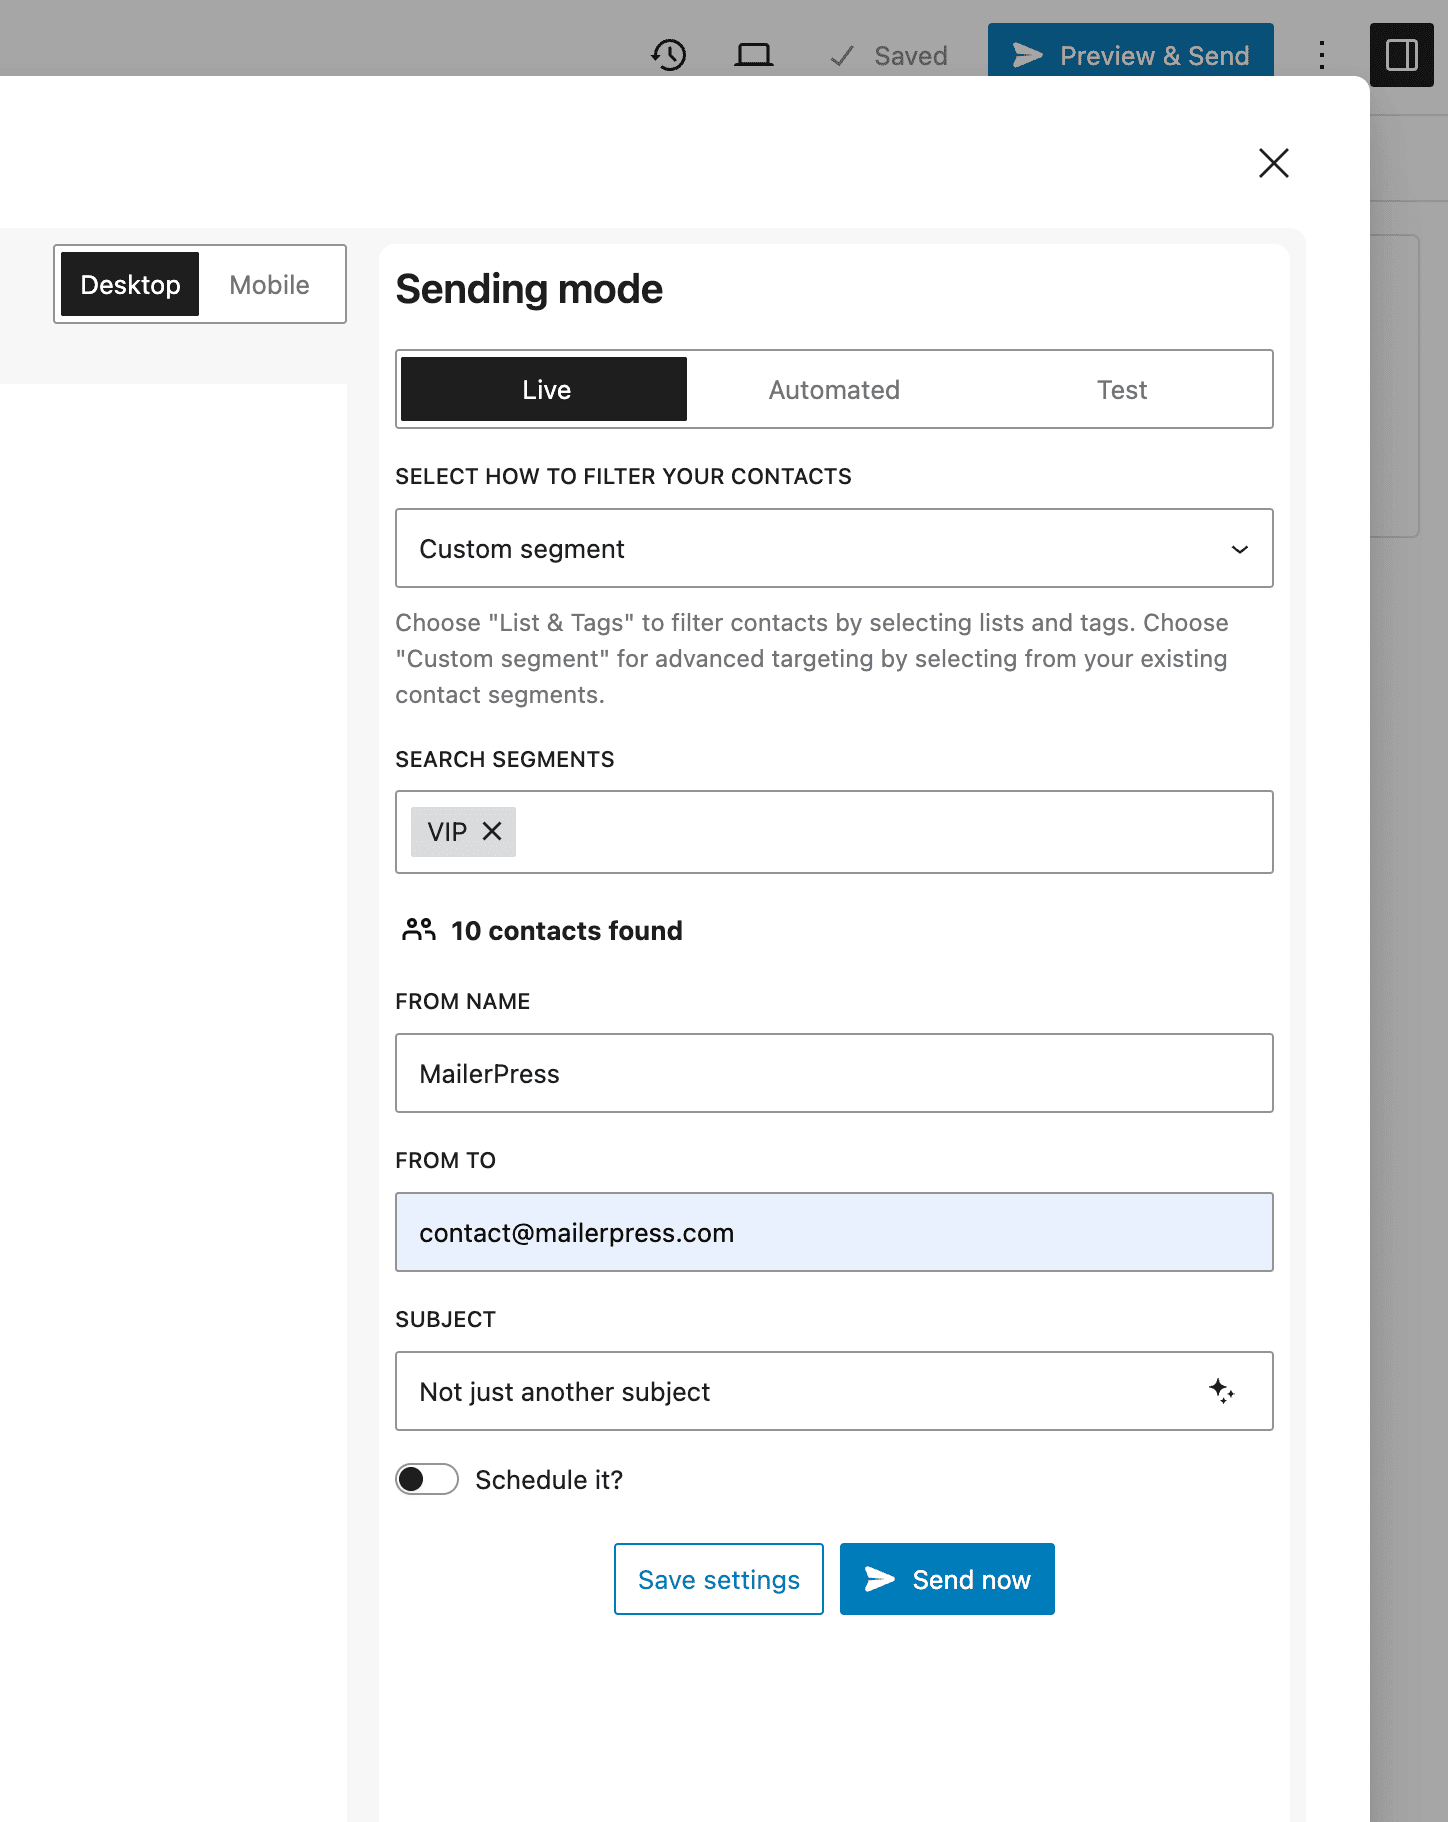
Send Email Campaigns Using This Segment
Now you can use this new segment for your email campaigns.
To do that, create a new campaign.
From the Preview and Send modal, choose Custom segment under “Select how to filter your contacts“.
Select your custom segment, eg: “VIP“.
That’s it! Your email is now setup to send your email campaign to the contacts matching this segment.