A webhook is a way for one application to automatically send real-time data to another application whenever a specific event happens. Instead of repeatedly asking (“polling”) a system to check for updates, a webhook allows systems to instantly exchange information by sending an HTTP request (usually a POST request) to a predefined URL.
Webhooks work in both directions: MailerPress can send event data to external services (such as when a subscriber joins a list or a form is submitted), and external services can send data back to your WordPress site through dedicated webhook endpoints.
This two-way communication enables real-time synchronization, automation, and seamless integrations without manual intervention.
Requirements
MailerPress Pro 1.5 is required for this feature.
Create your first outgoing webhooks: from MailerPress to external service
Navigate to your WordPress admin dashboard, then go to MailerPress → Webhooks → Outgoing Webhooks.
First, generate a secret key by clicking the Generate button. Once the key is created, click Copy and paste it into your external service where required. This key ensures secure communication between MailerPress and the external system.
Next, activate the webhooks you want to use by selecting them from the available categories:
- Contacts
- Subscription
- Campaigns
- Email Engagement
Within each category, enable the desired events by toggling them to Enabled.
For every webhook you activate, click Add URL in the Webhook URLs section and paste the endpoint URL provided by your external service.
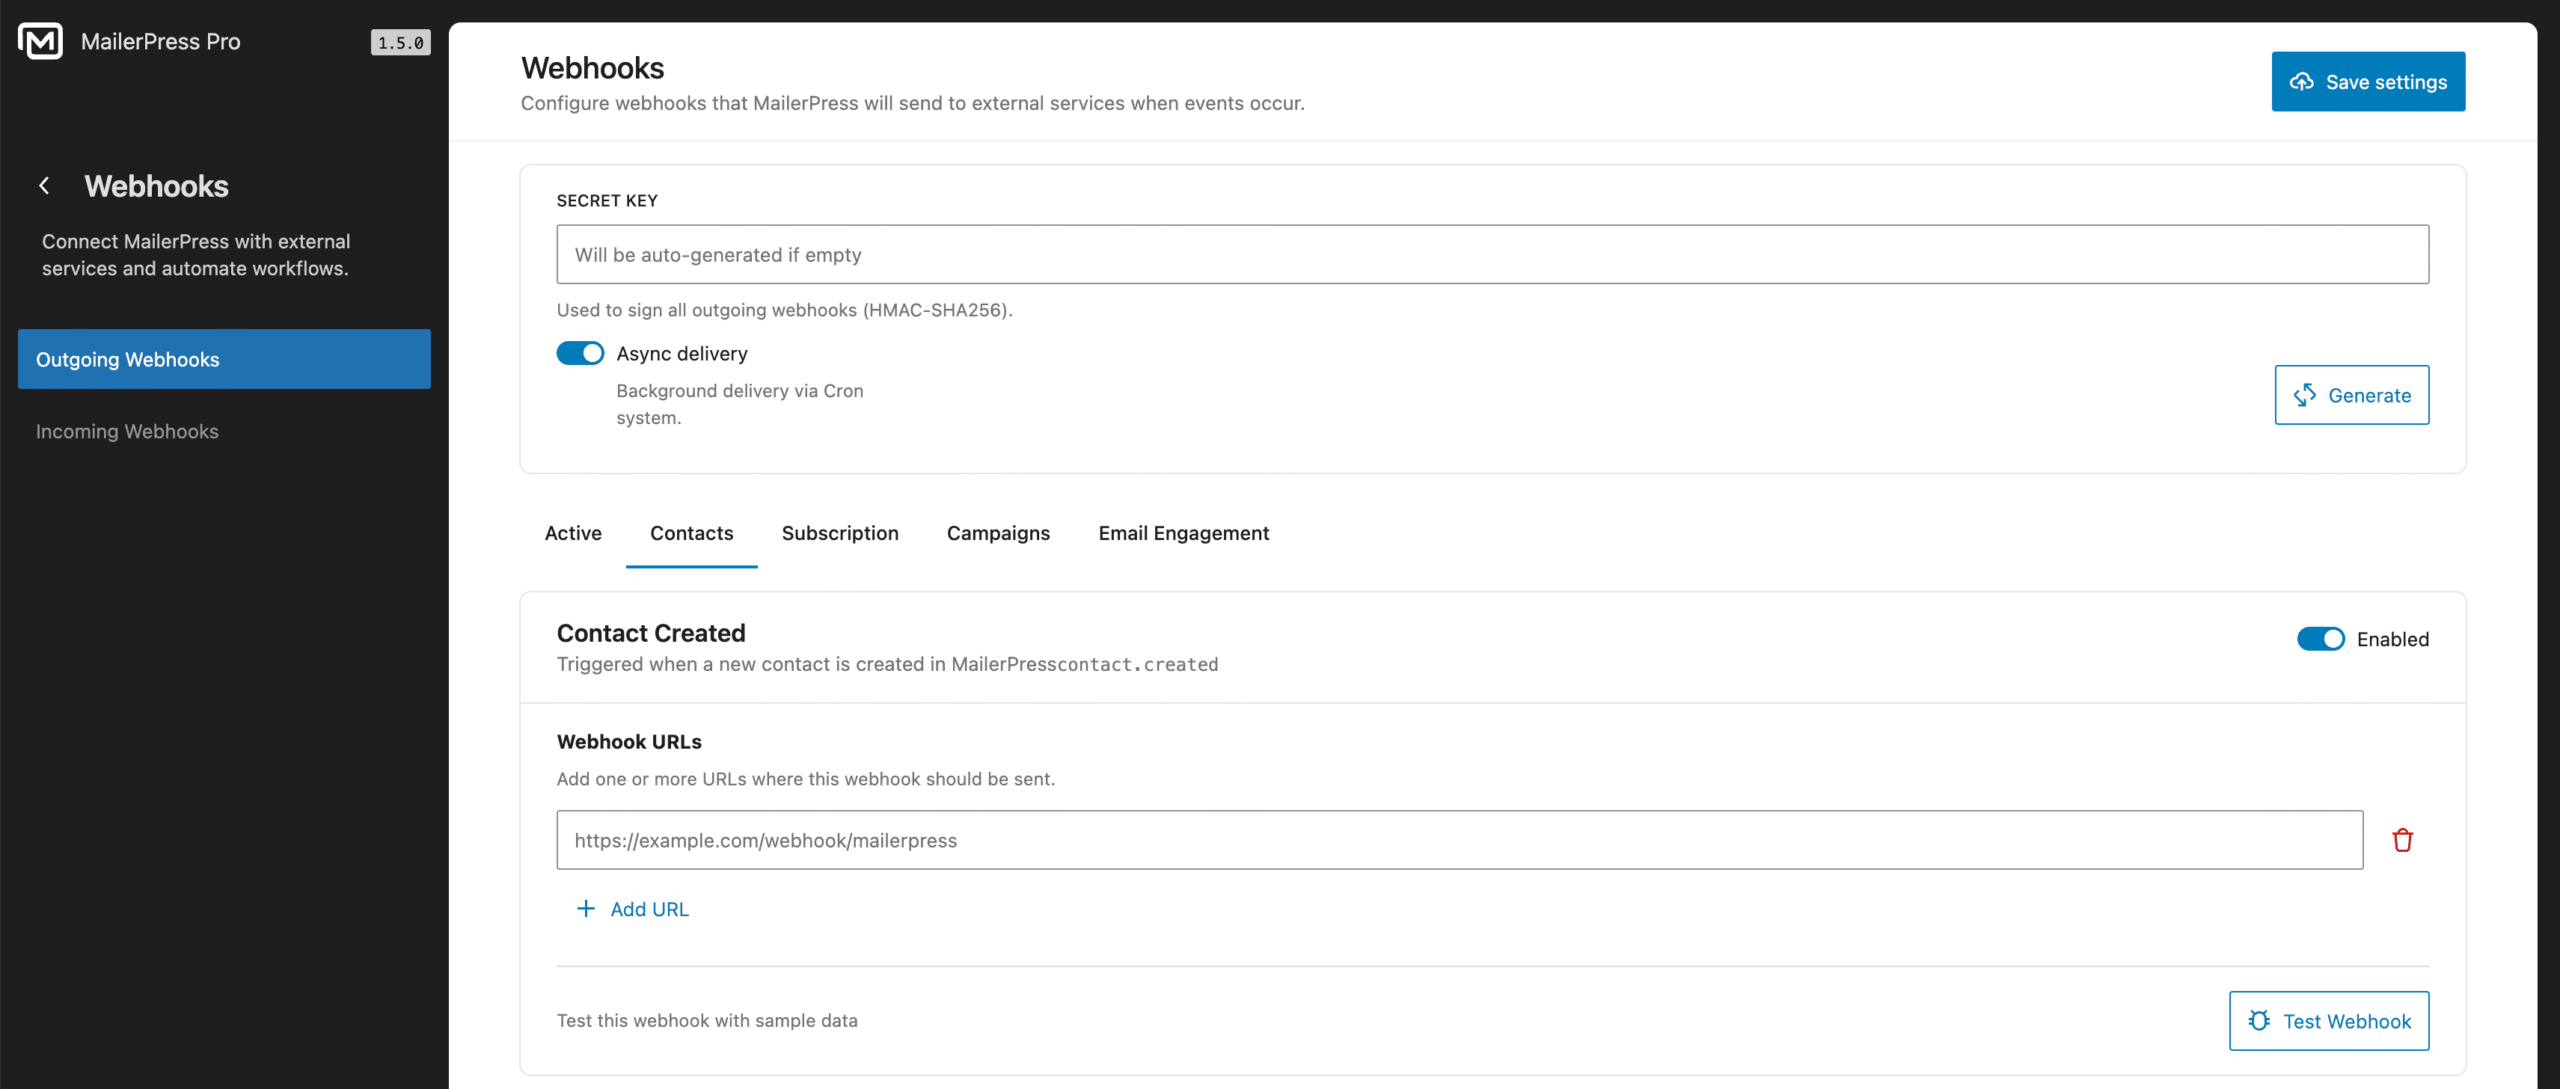
When you have finished configuring your webhooks, click Save Settings to apply your changes.
Finally, use the Test Webhook button to verify that your configuration is working correctly.
Create your first incoming webhooks: from external service to MailerPress
Navigate to your WordPress admin dashboard, then go to MailerPress → Webhooks → Incoming Webhooks.
Click the Add webhook button.
A new modal appears.
- Enter a description to easily identify the webhook from the webhooks list;
- Check Enabled to activate the webhook;
- Copy and paste the webhook URL to your external service;
- If you need a webhook signature, activate the dedicated toggle and copy/paste the secret key to your external service;
- Then, choose the actions to execute;
- Finally, click Save changes.
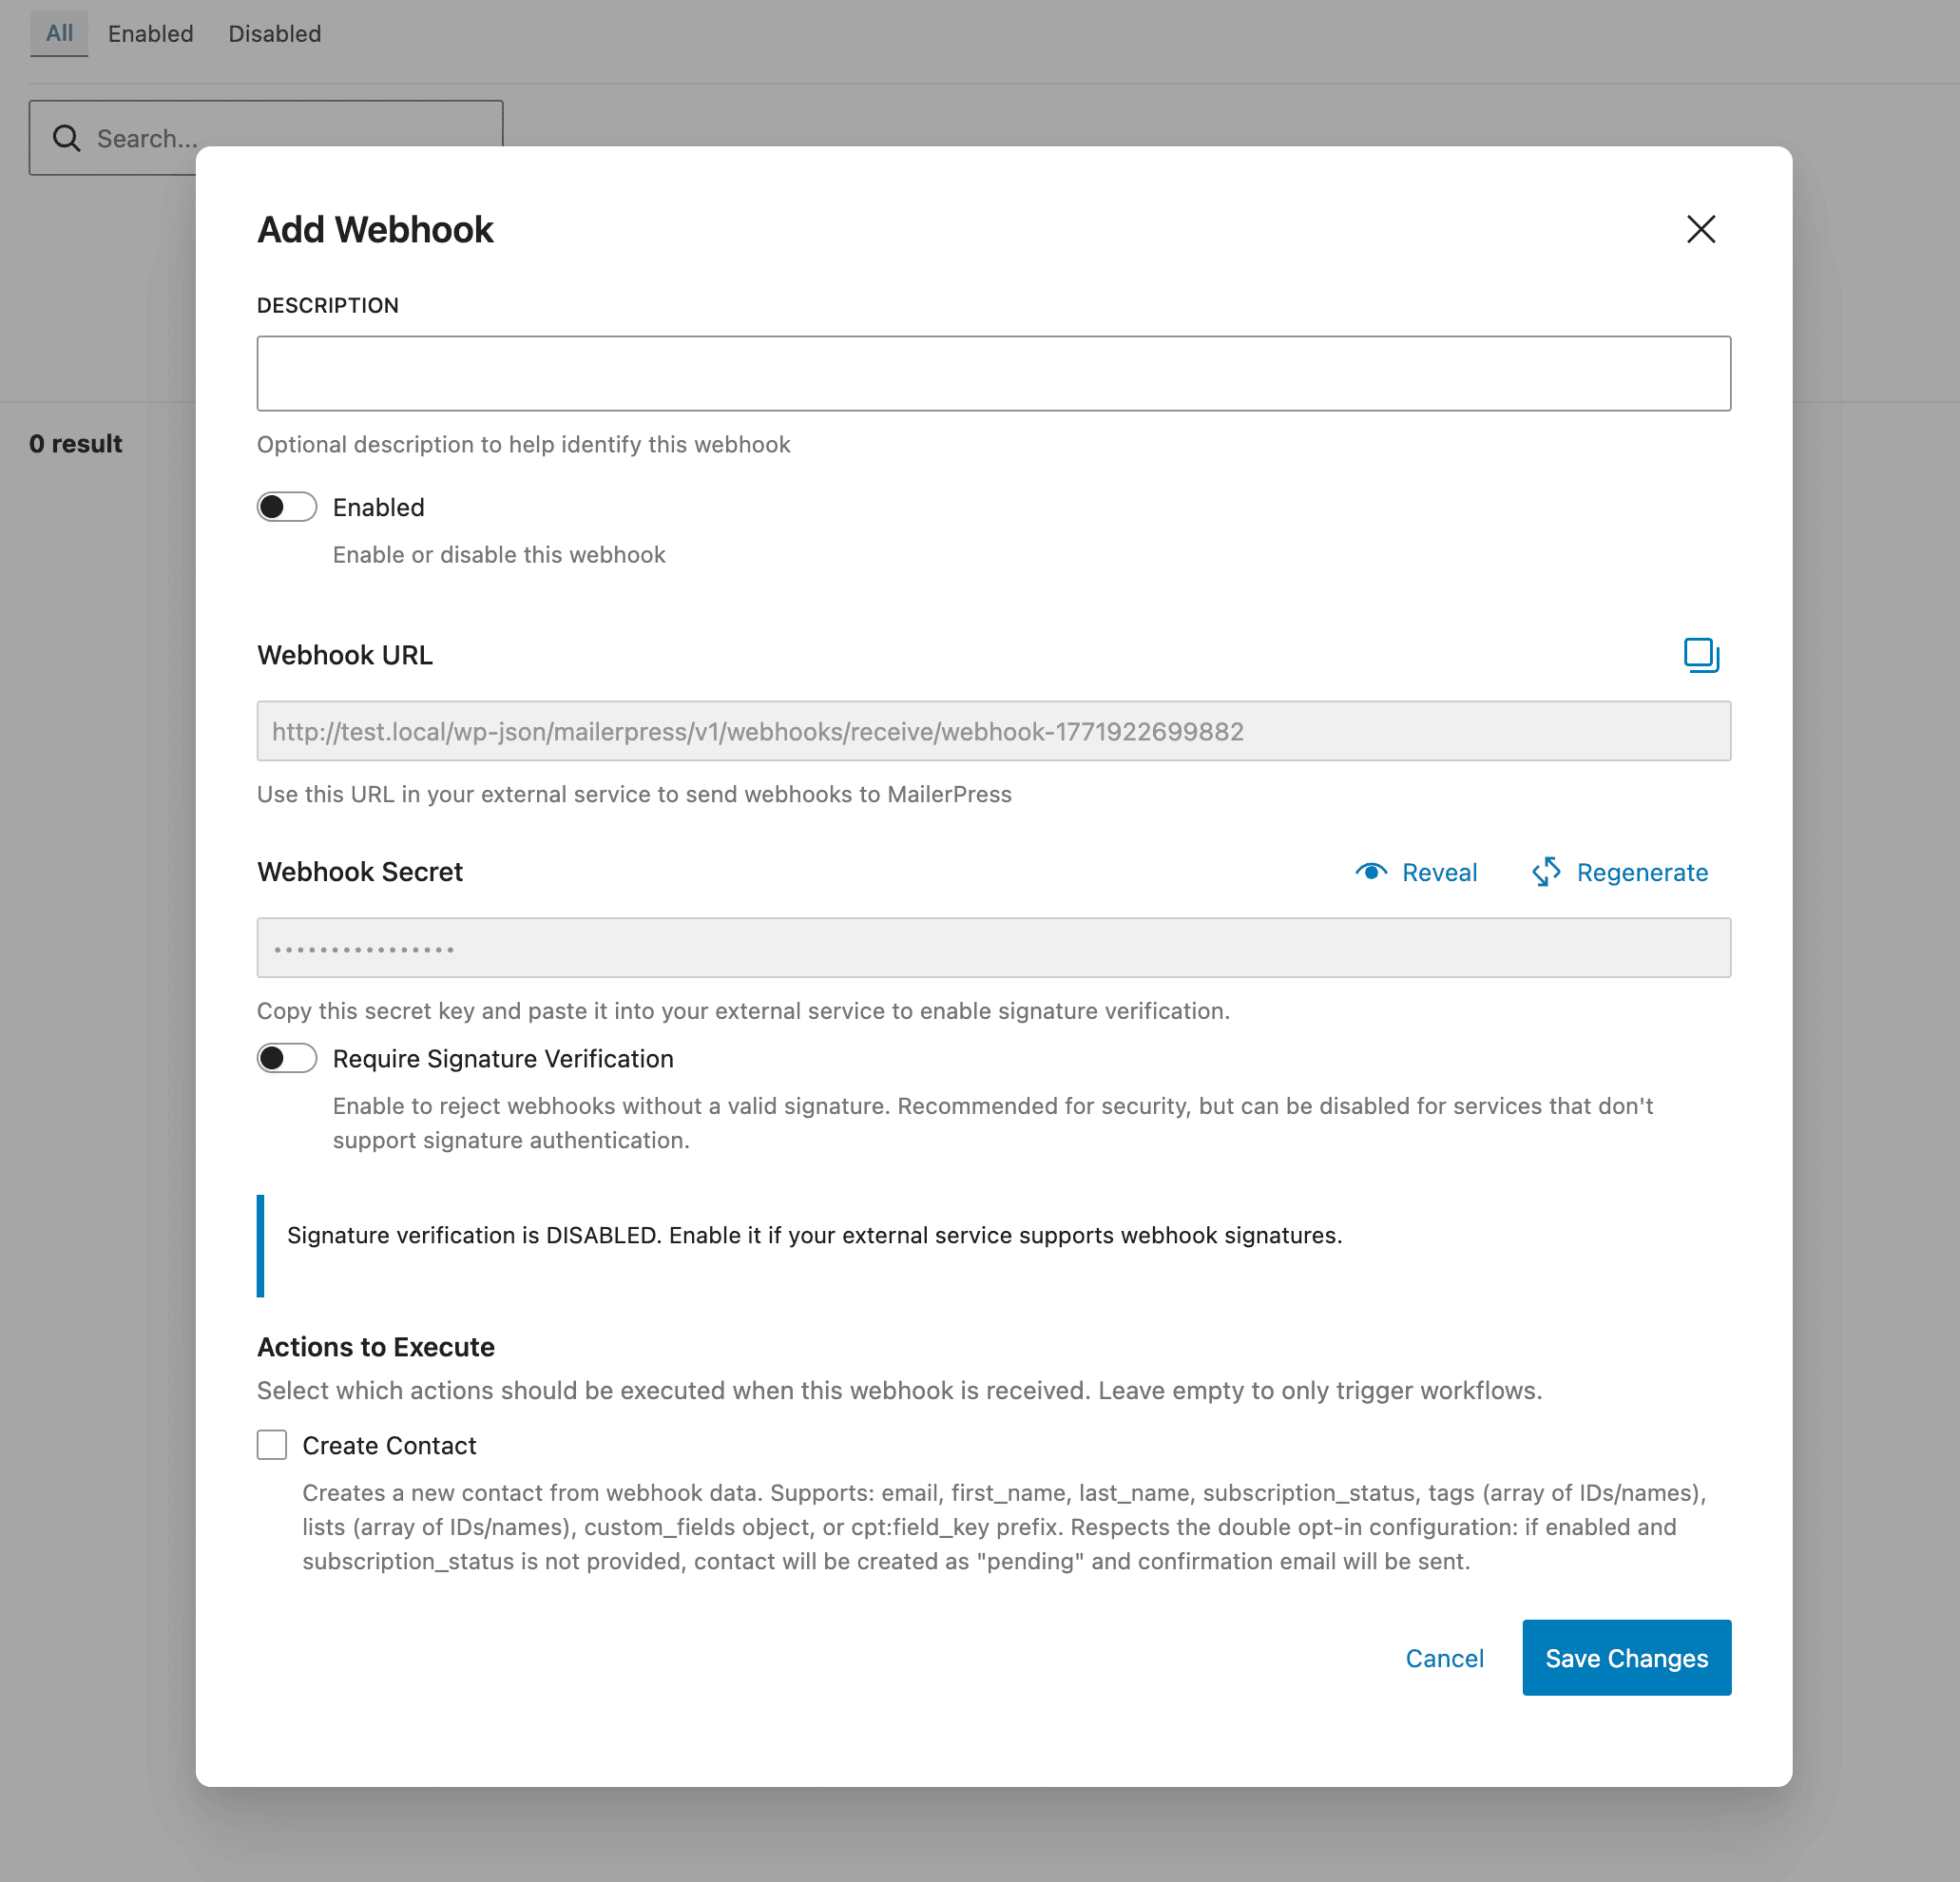
Please note that signature verification is intended for advanced users only.