MailerPress v2.0 is required to support automations. Pro is highly recommended to unlock the full power of automation features.
MailerPress Automations let you create workflows that run automatically based on user actions, such as subscribing to a list or submitting a form. You can use them to send targeted emails, confirm subscriptions, or trigger follow-ups without manual intervention.
This helps streamline communication, improve engagement, and ensure a consistent experience for your contacts.
Before getting started
When building automations, start by clearly defining the goal of the workflow (for example, welcoming new subscribers or following up after sign-up).
Then choose a simple trigger that initiates the automation and add only the essential steps needed to achieve the desired outcome.
Keep your logic easy to follow by avoiding overly complex branching at the beginning.
It’s also a good practice to test your automation with sample contacts before activating it, so you can ensure everything works as expected.
Finally, review and refine your workflows regularly to improve performance and keep your messaging relevant.
Build your first automation: onboarding new subscribers
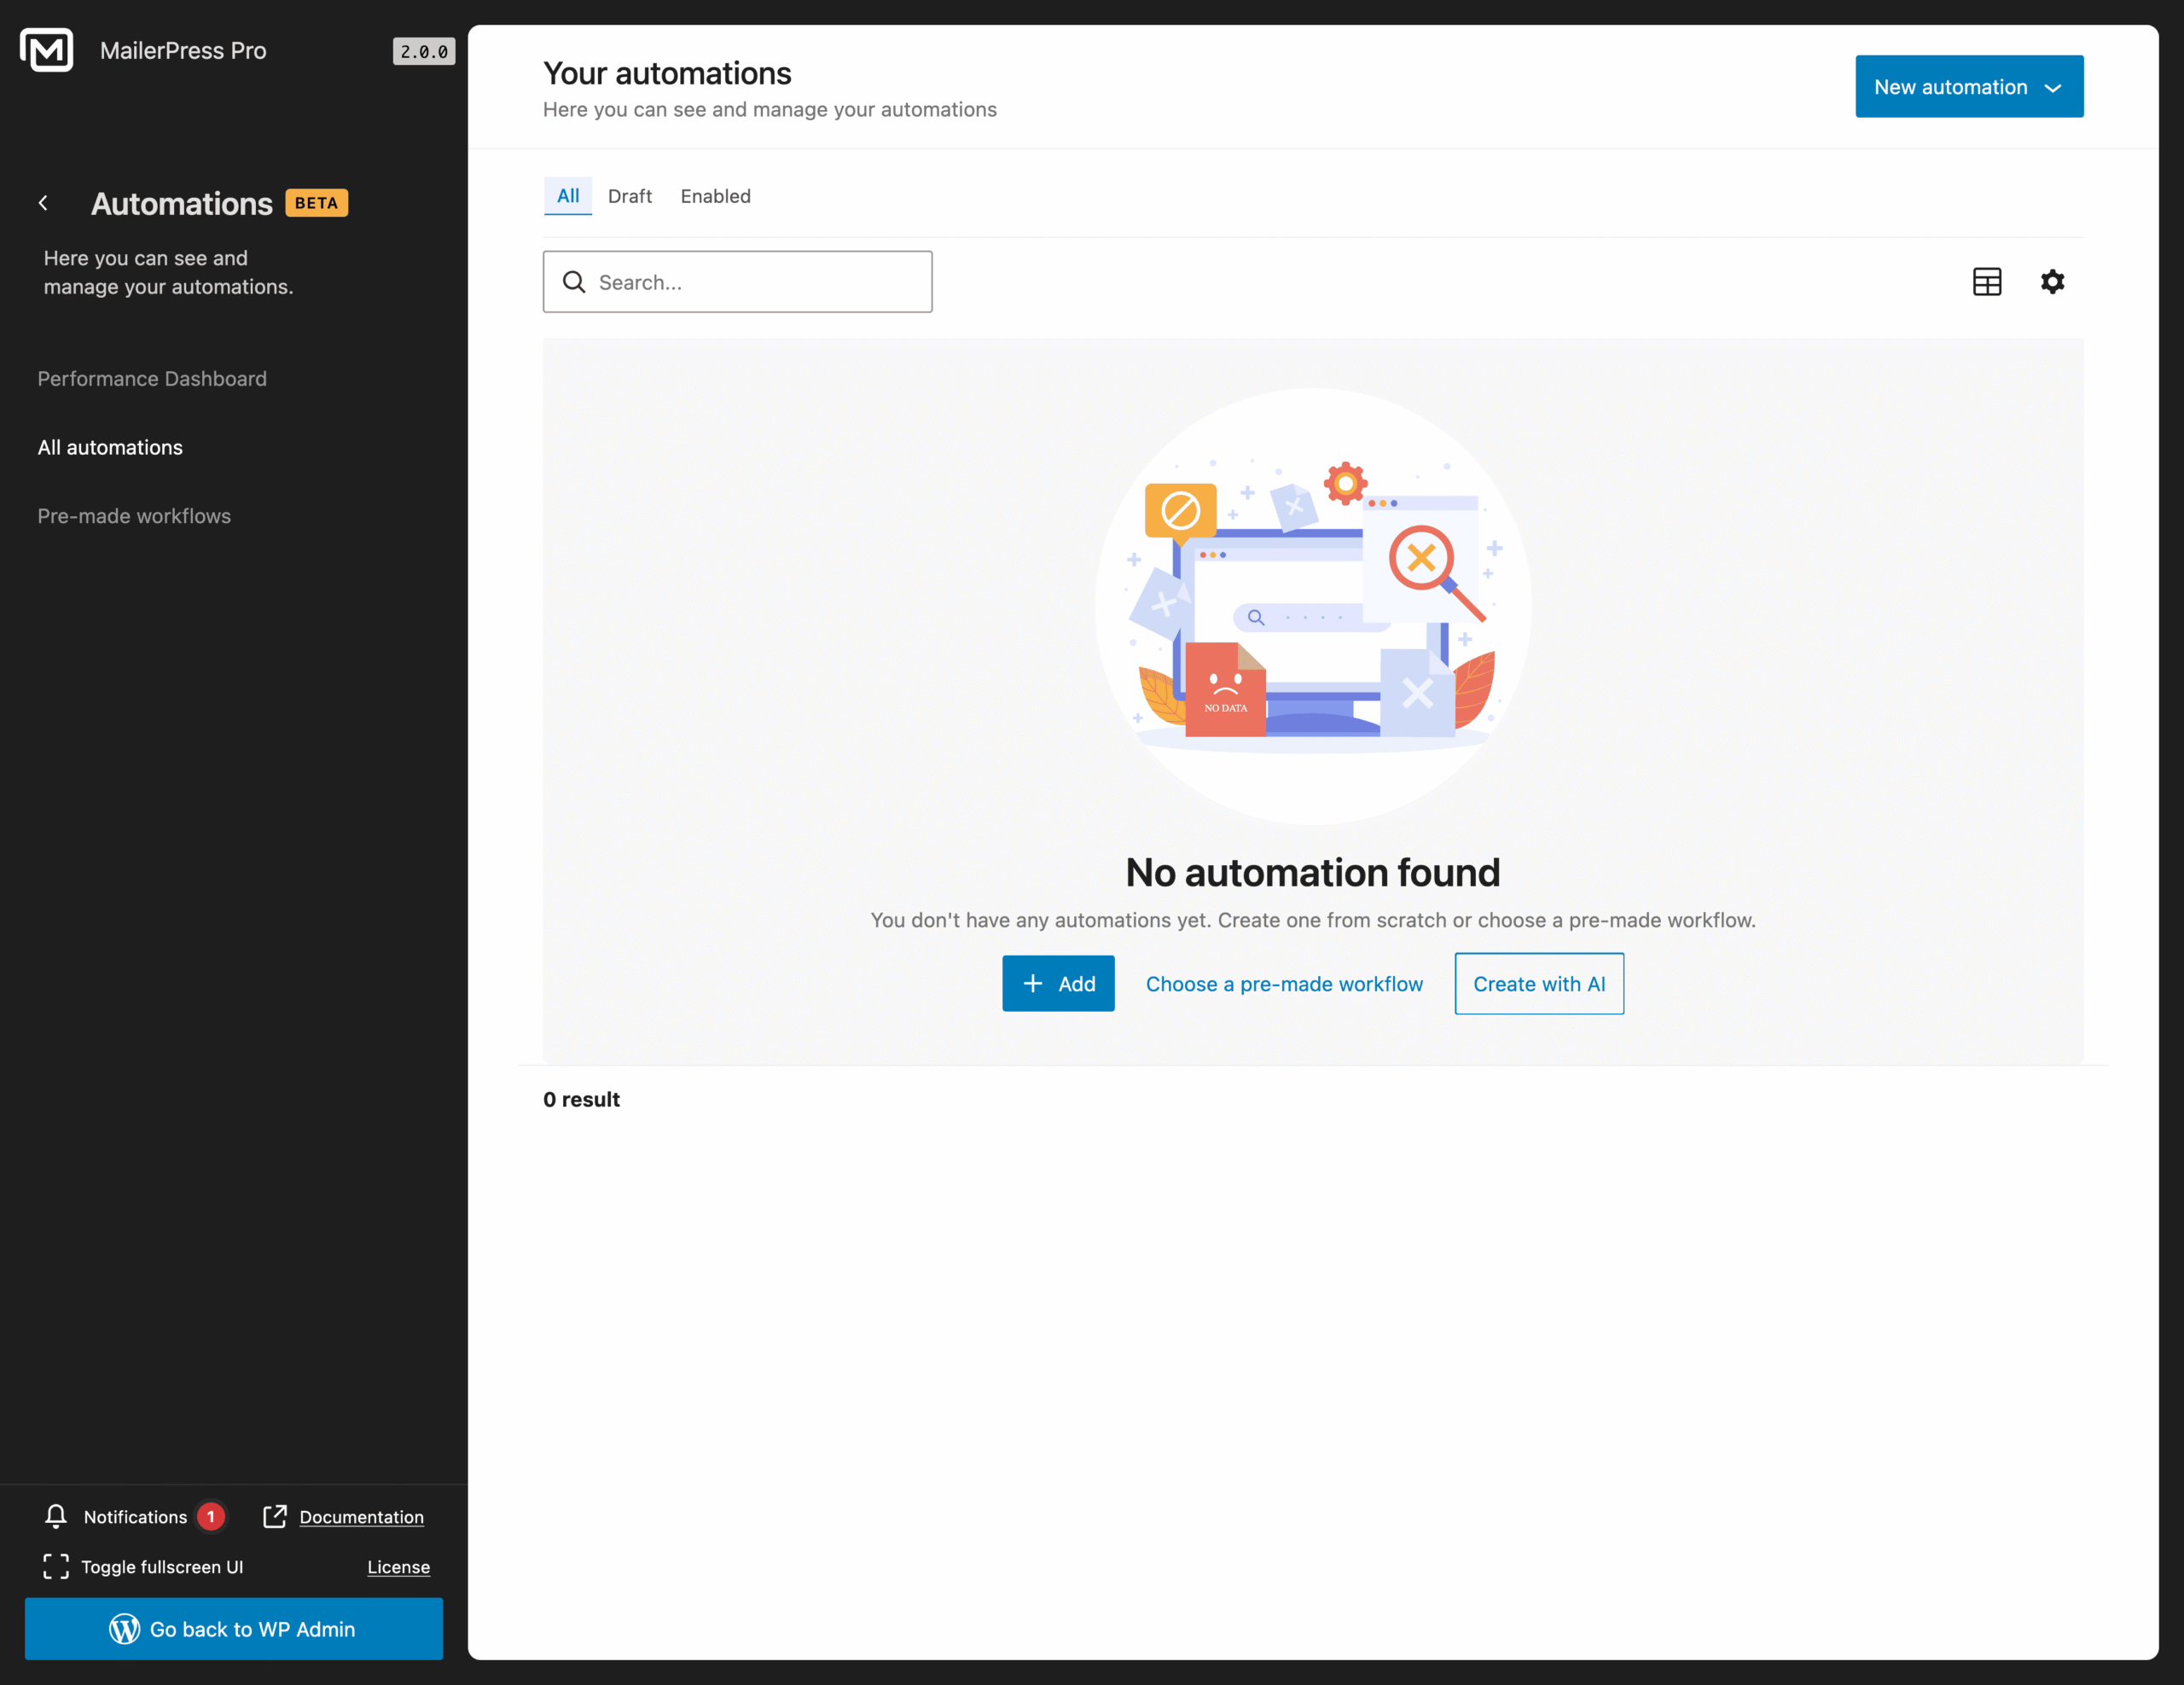
Sign in to your WordPress administration, then go to MailerPress, Automations.
Click the New automation button and choose Start from scratch.
Enter a name for your workflow to quickly identify it later.
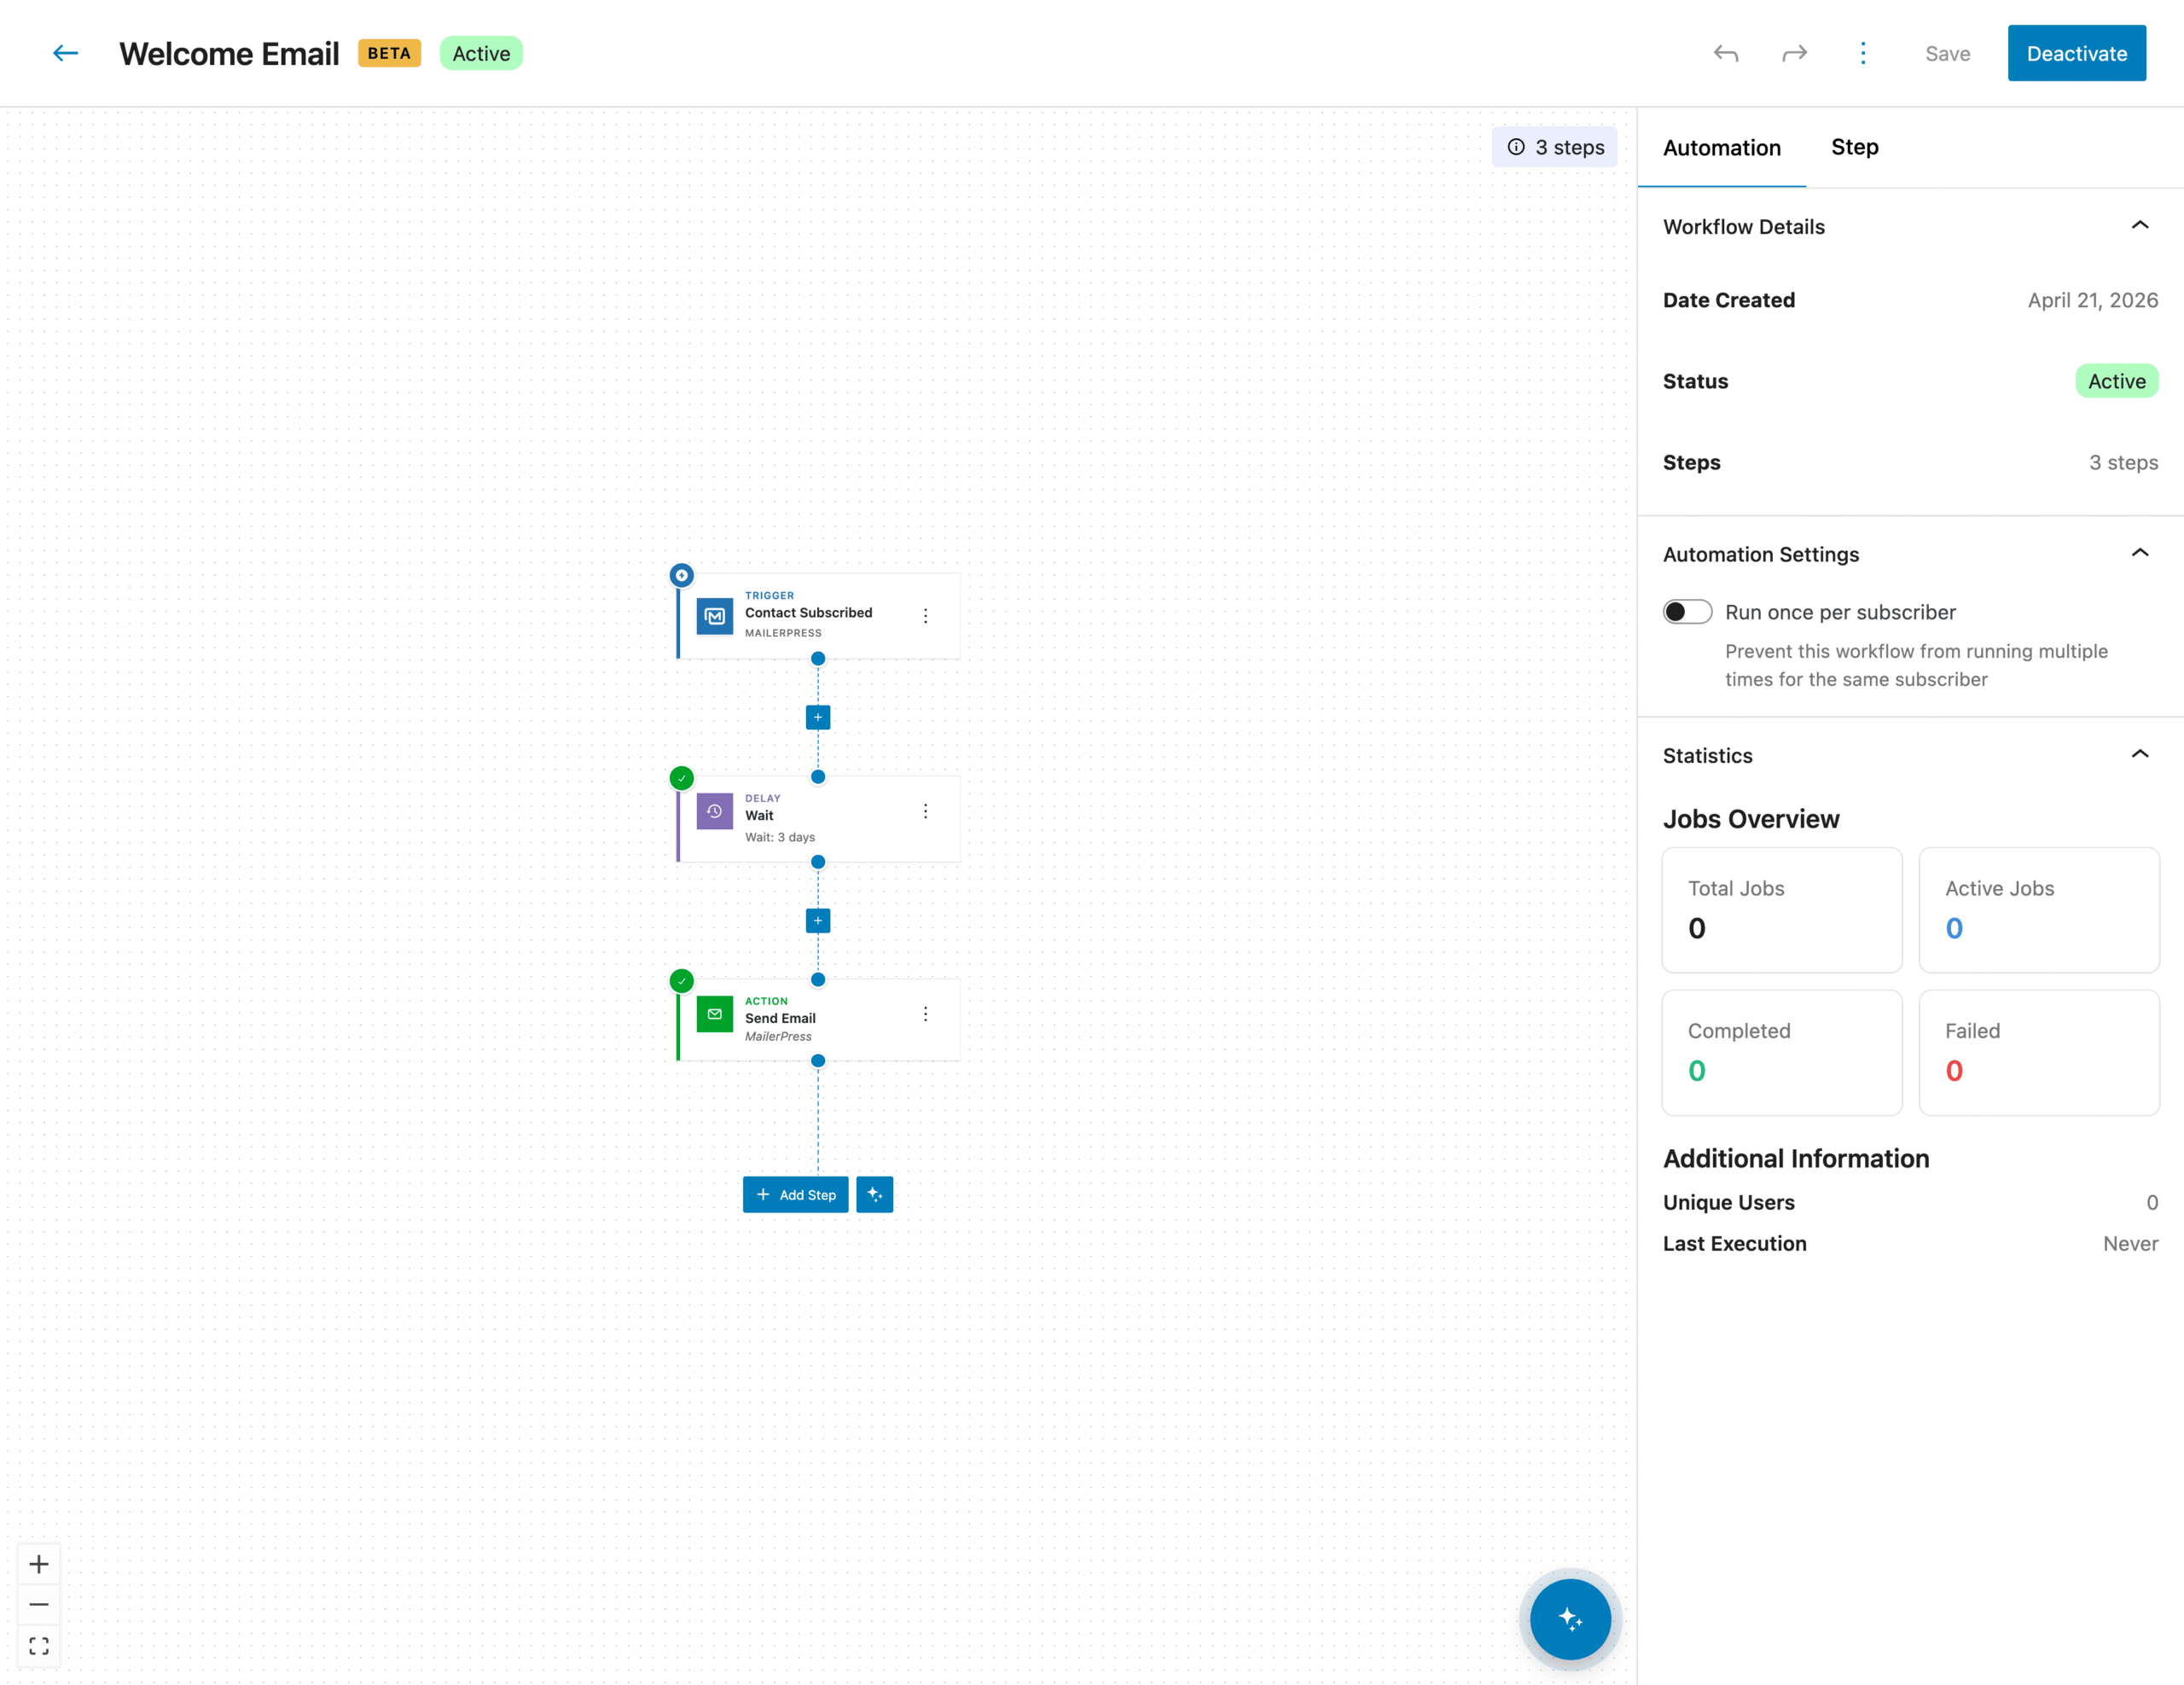
First step: choose a trigger
Click the “Choose a Trigger” link in the center of the canvas.
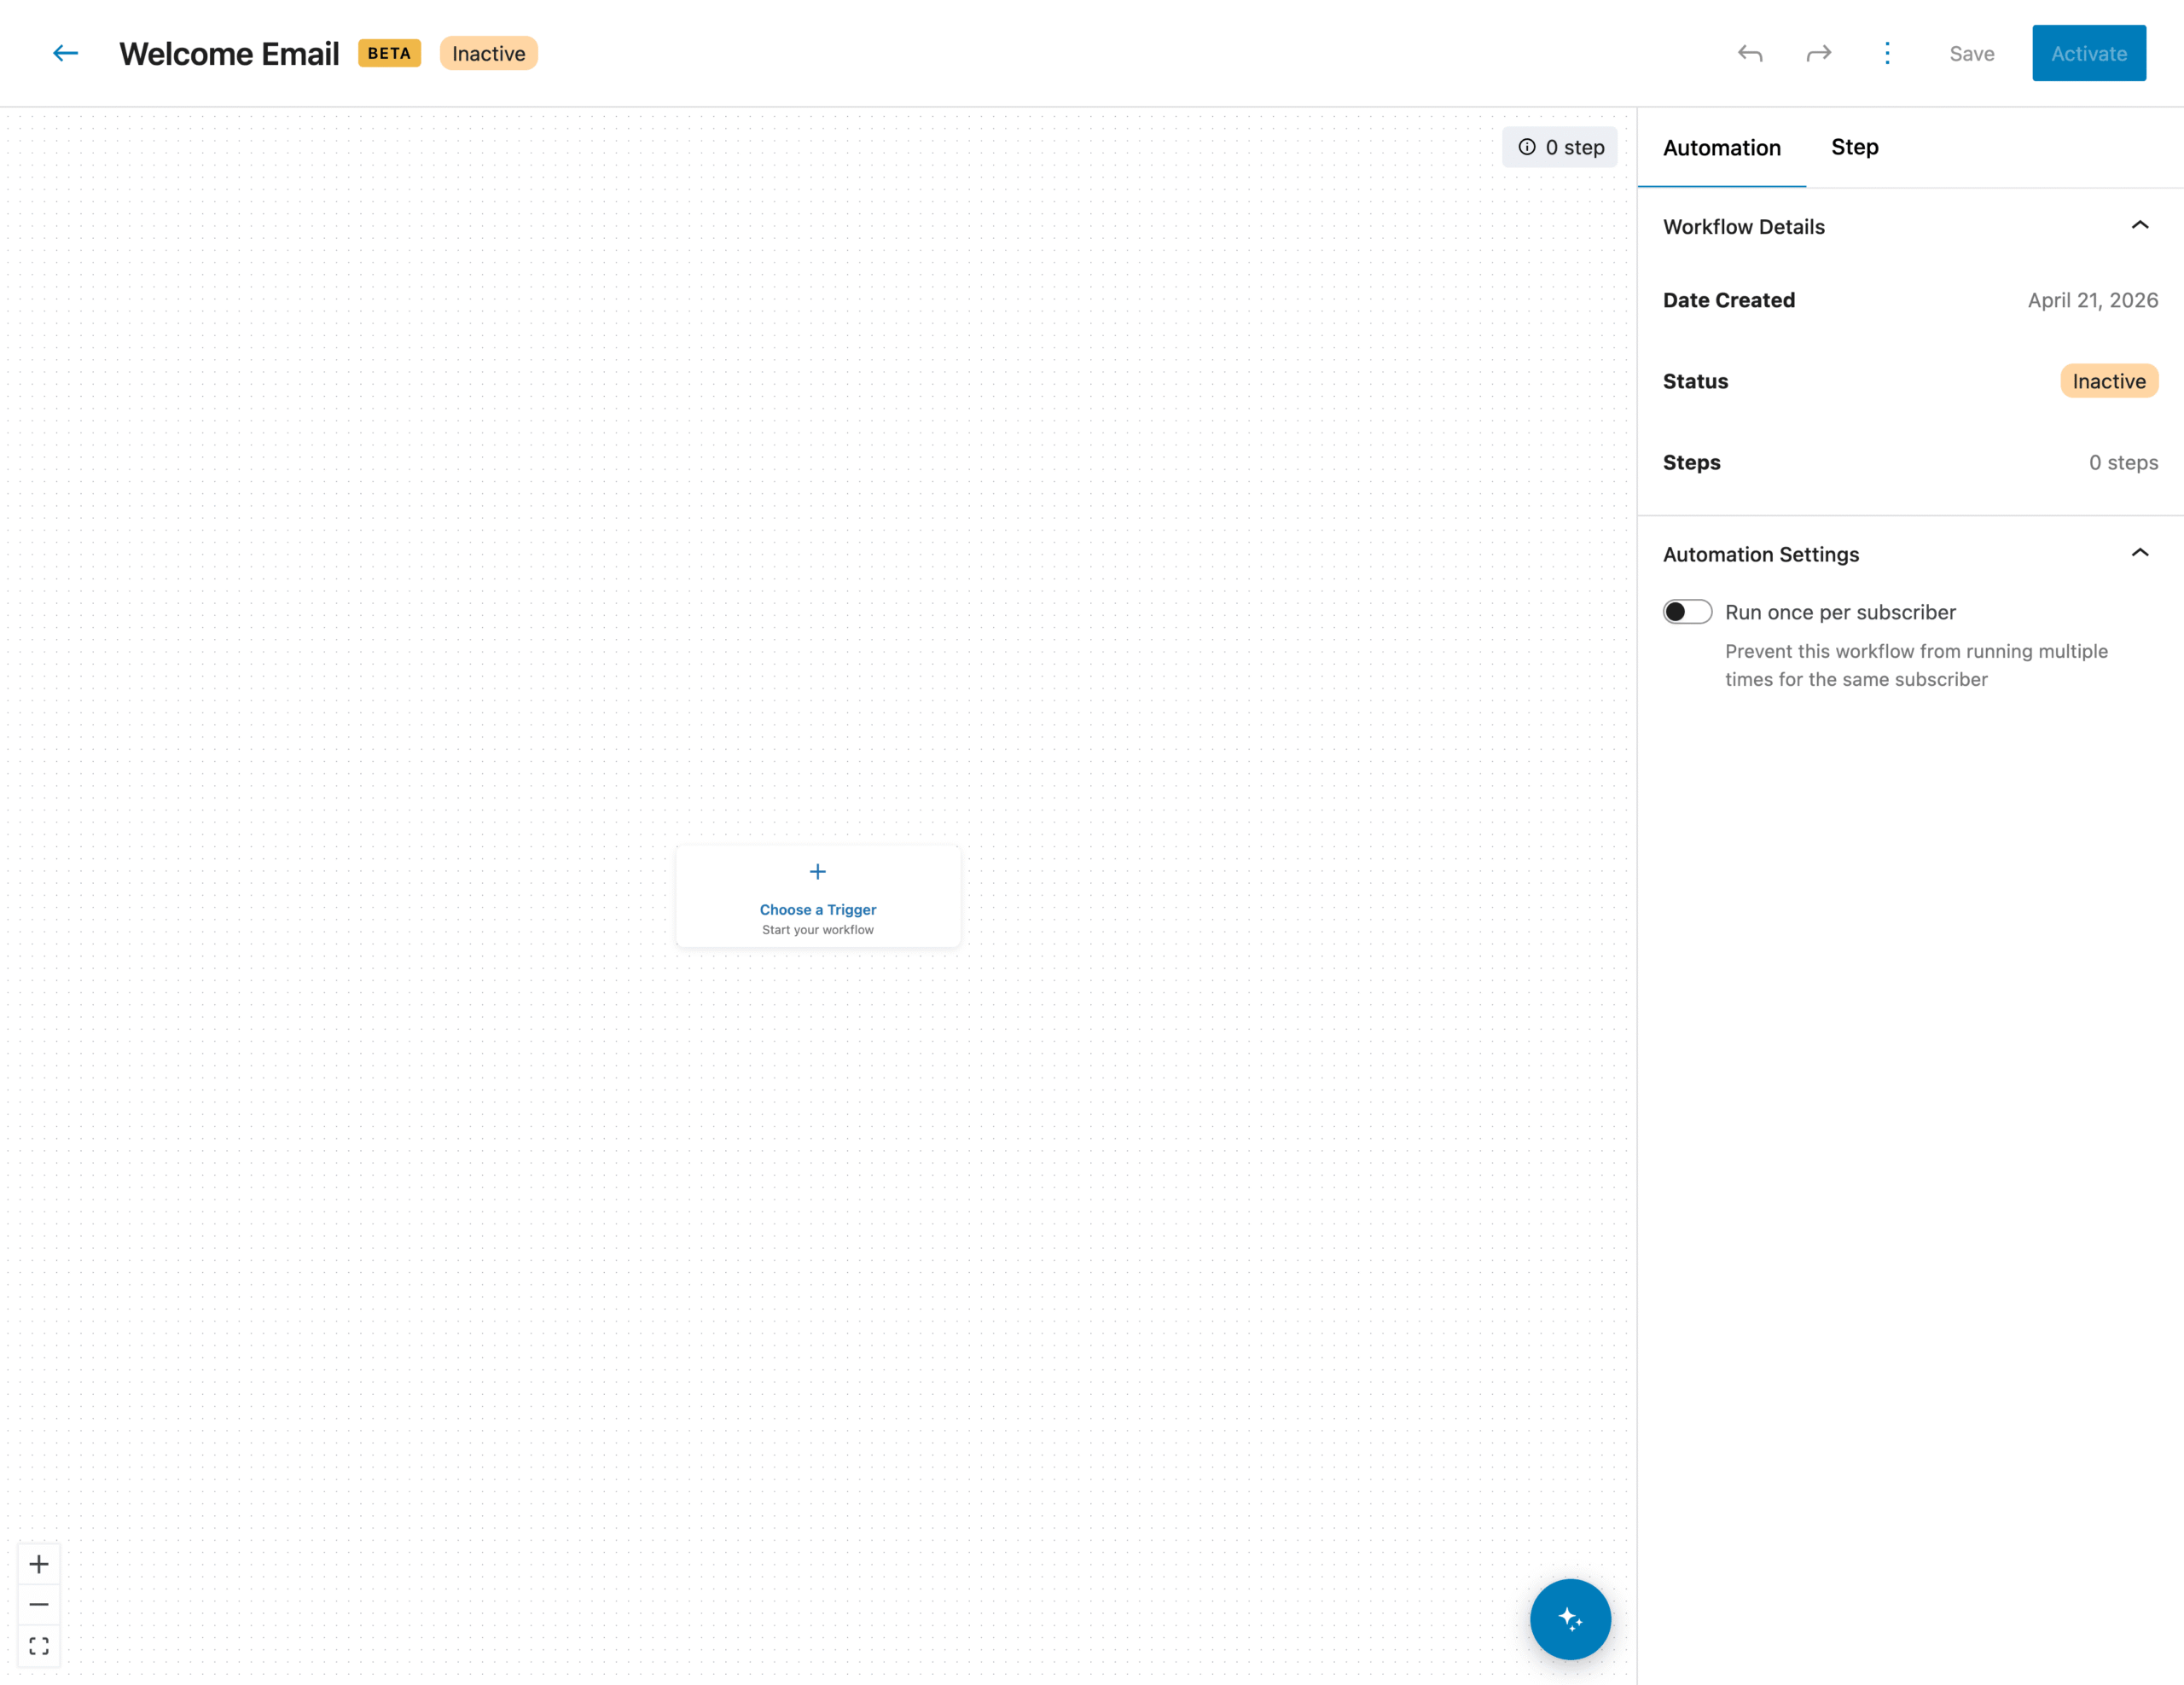
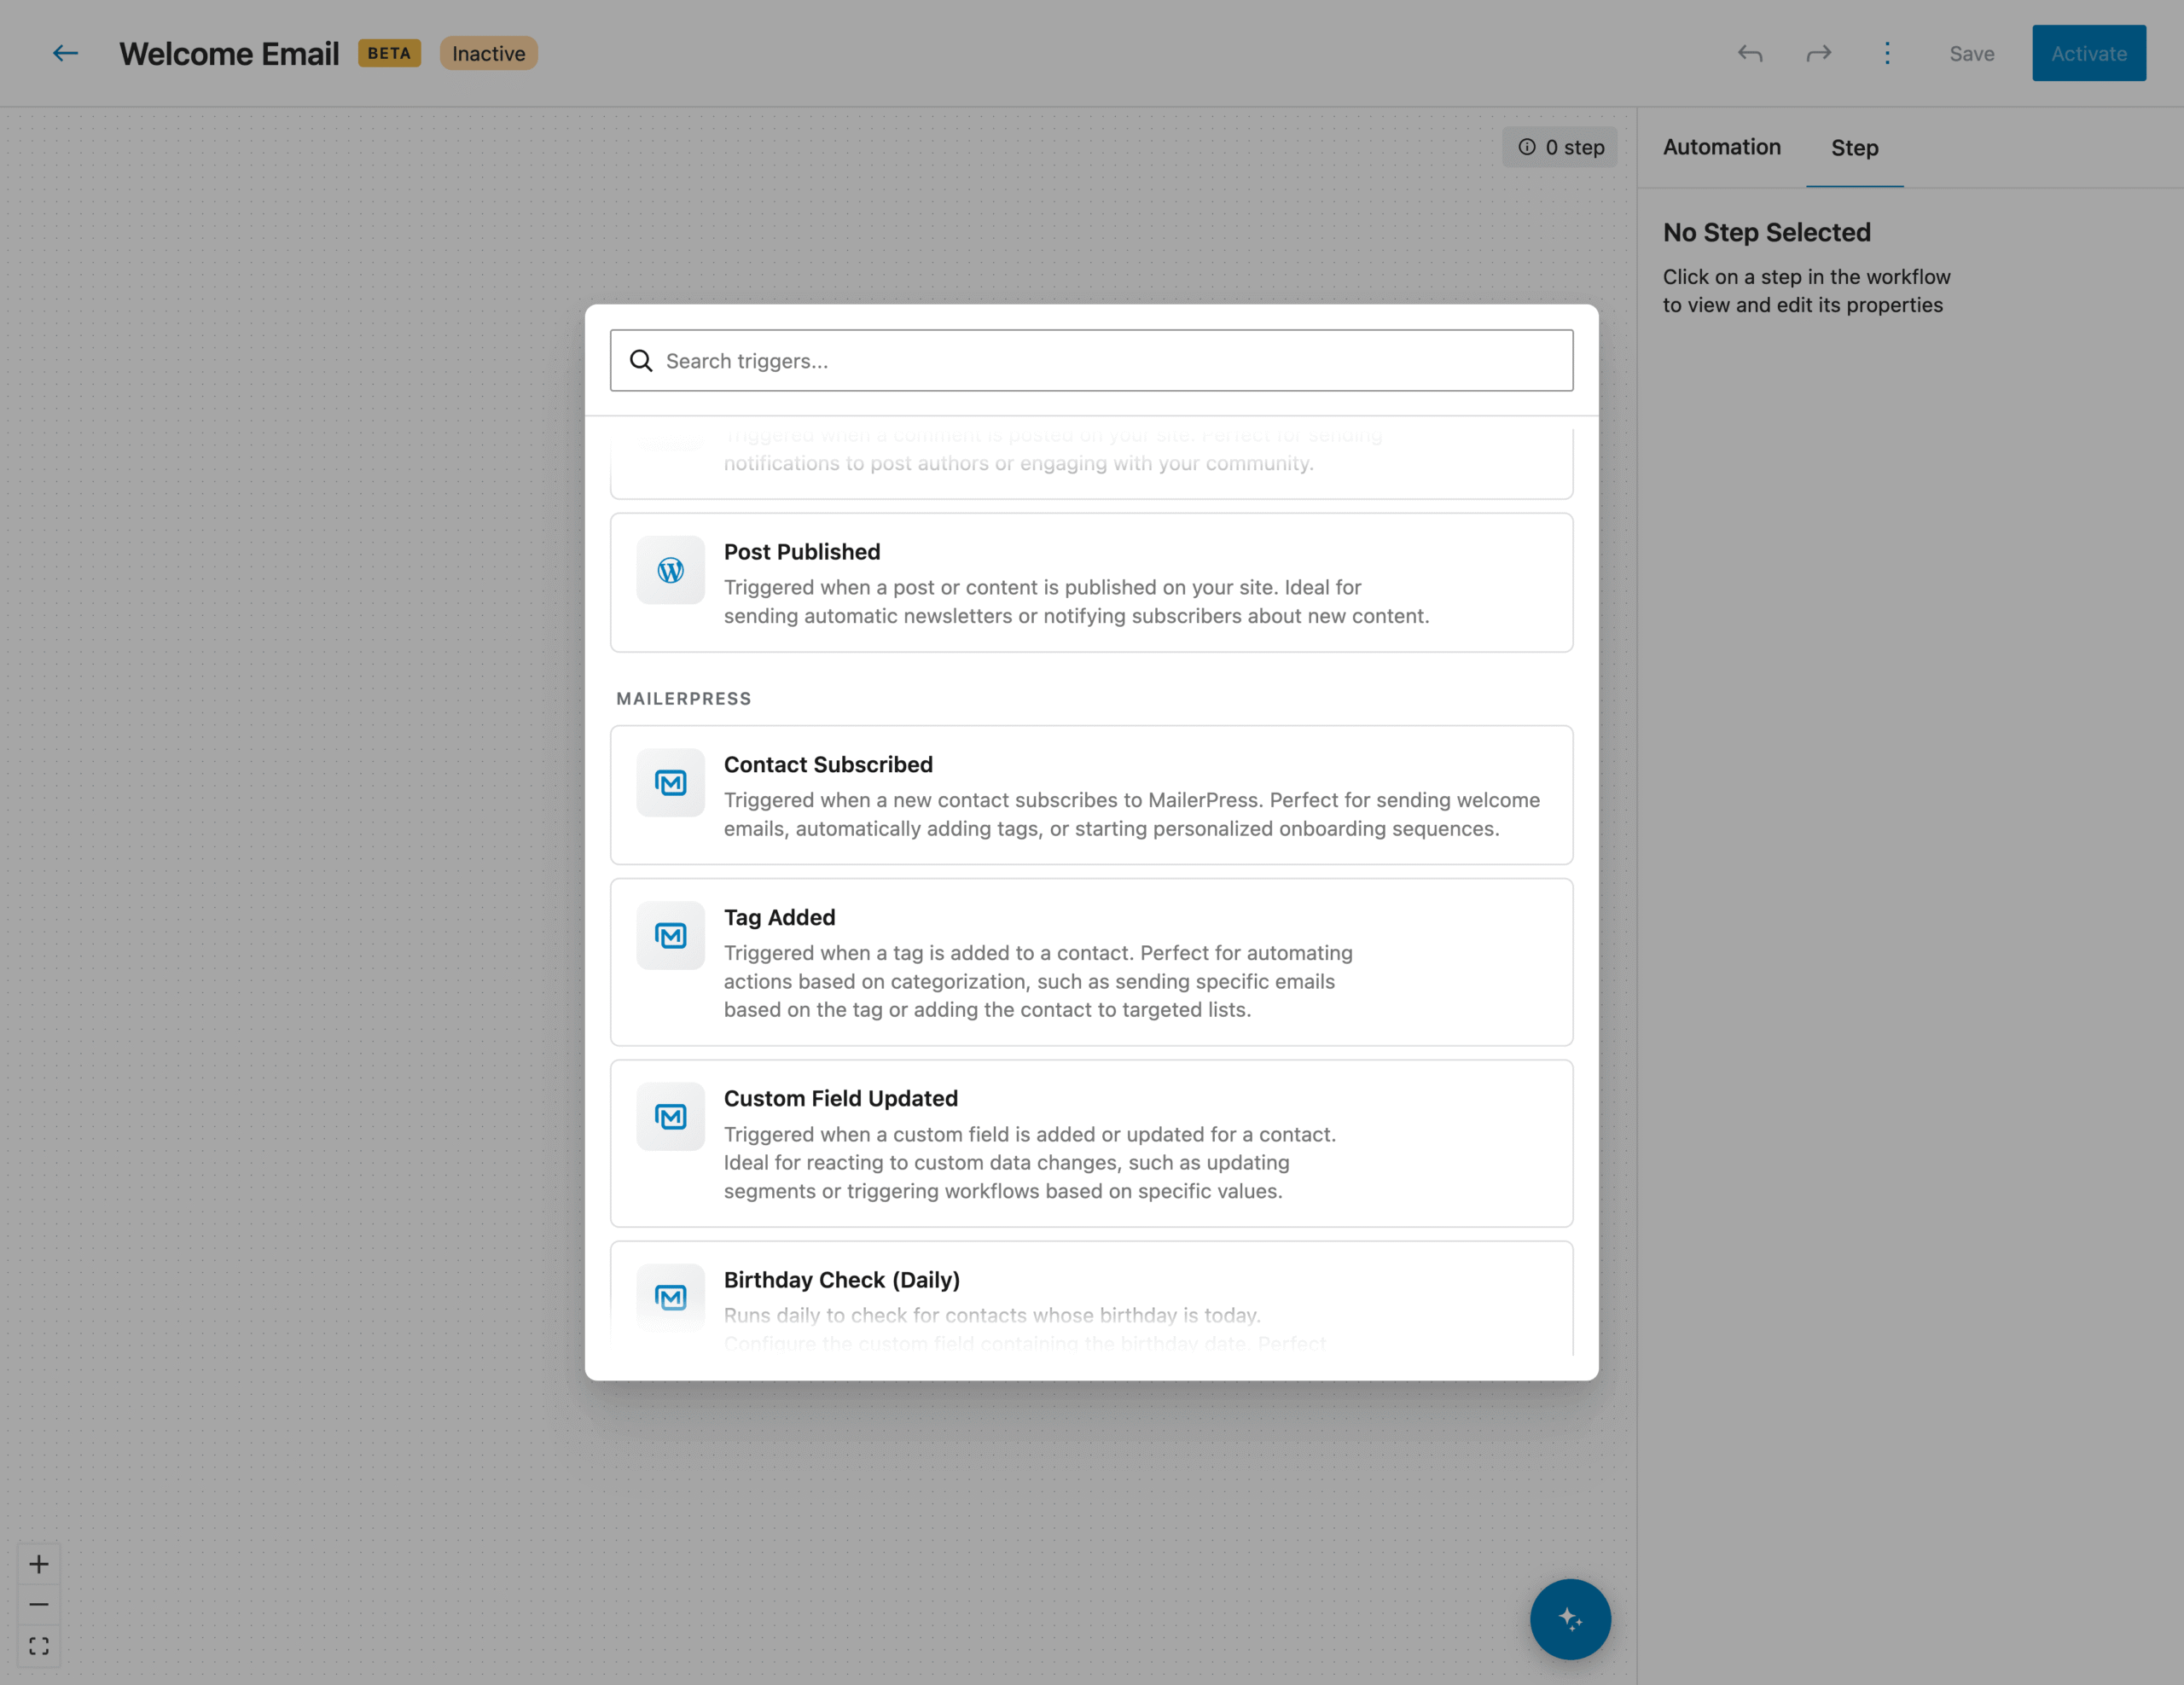
The trigger modal appears.
Scroll down and select “Contact Subscribed“.
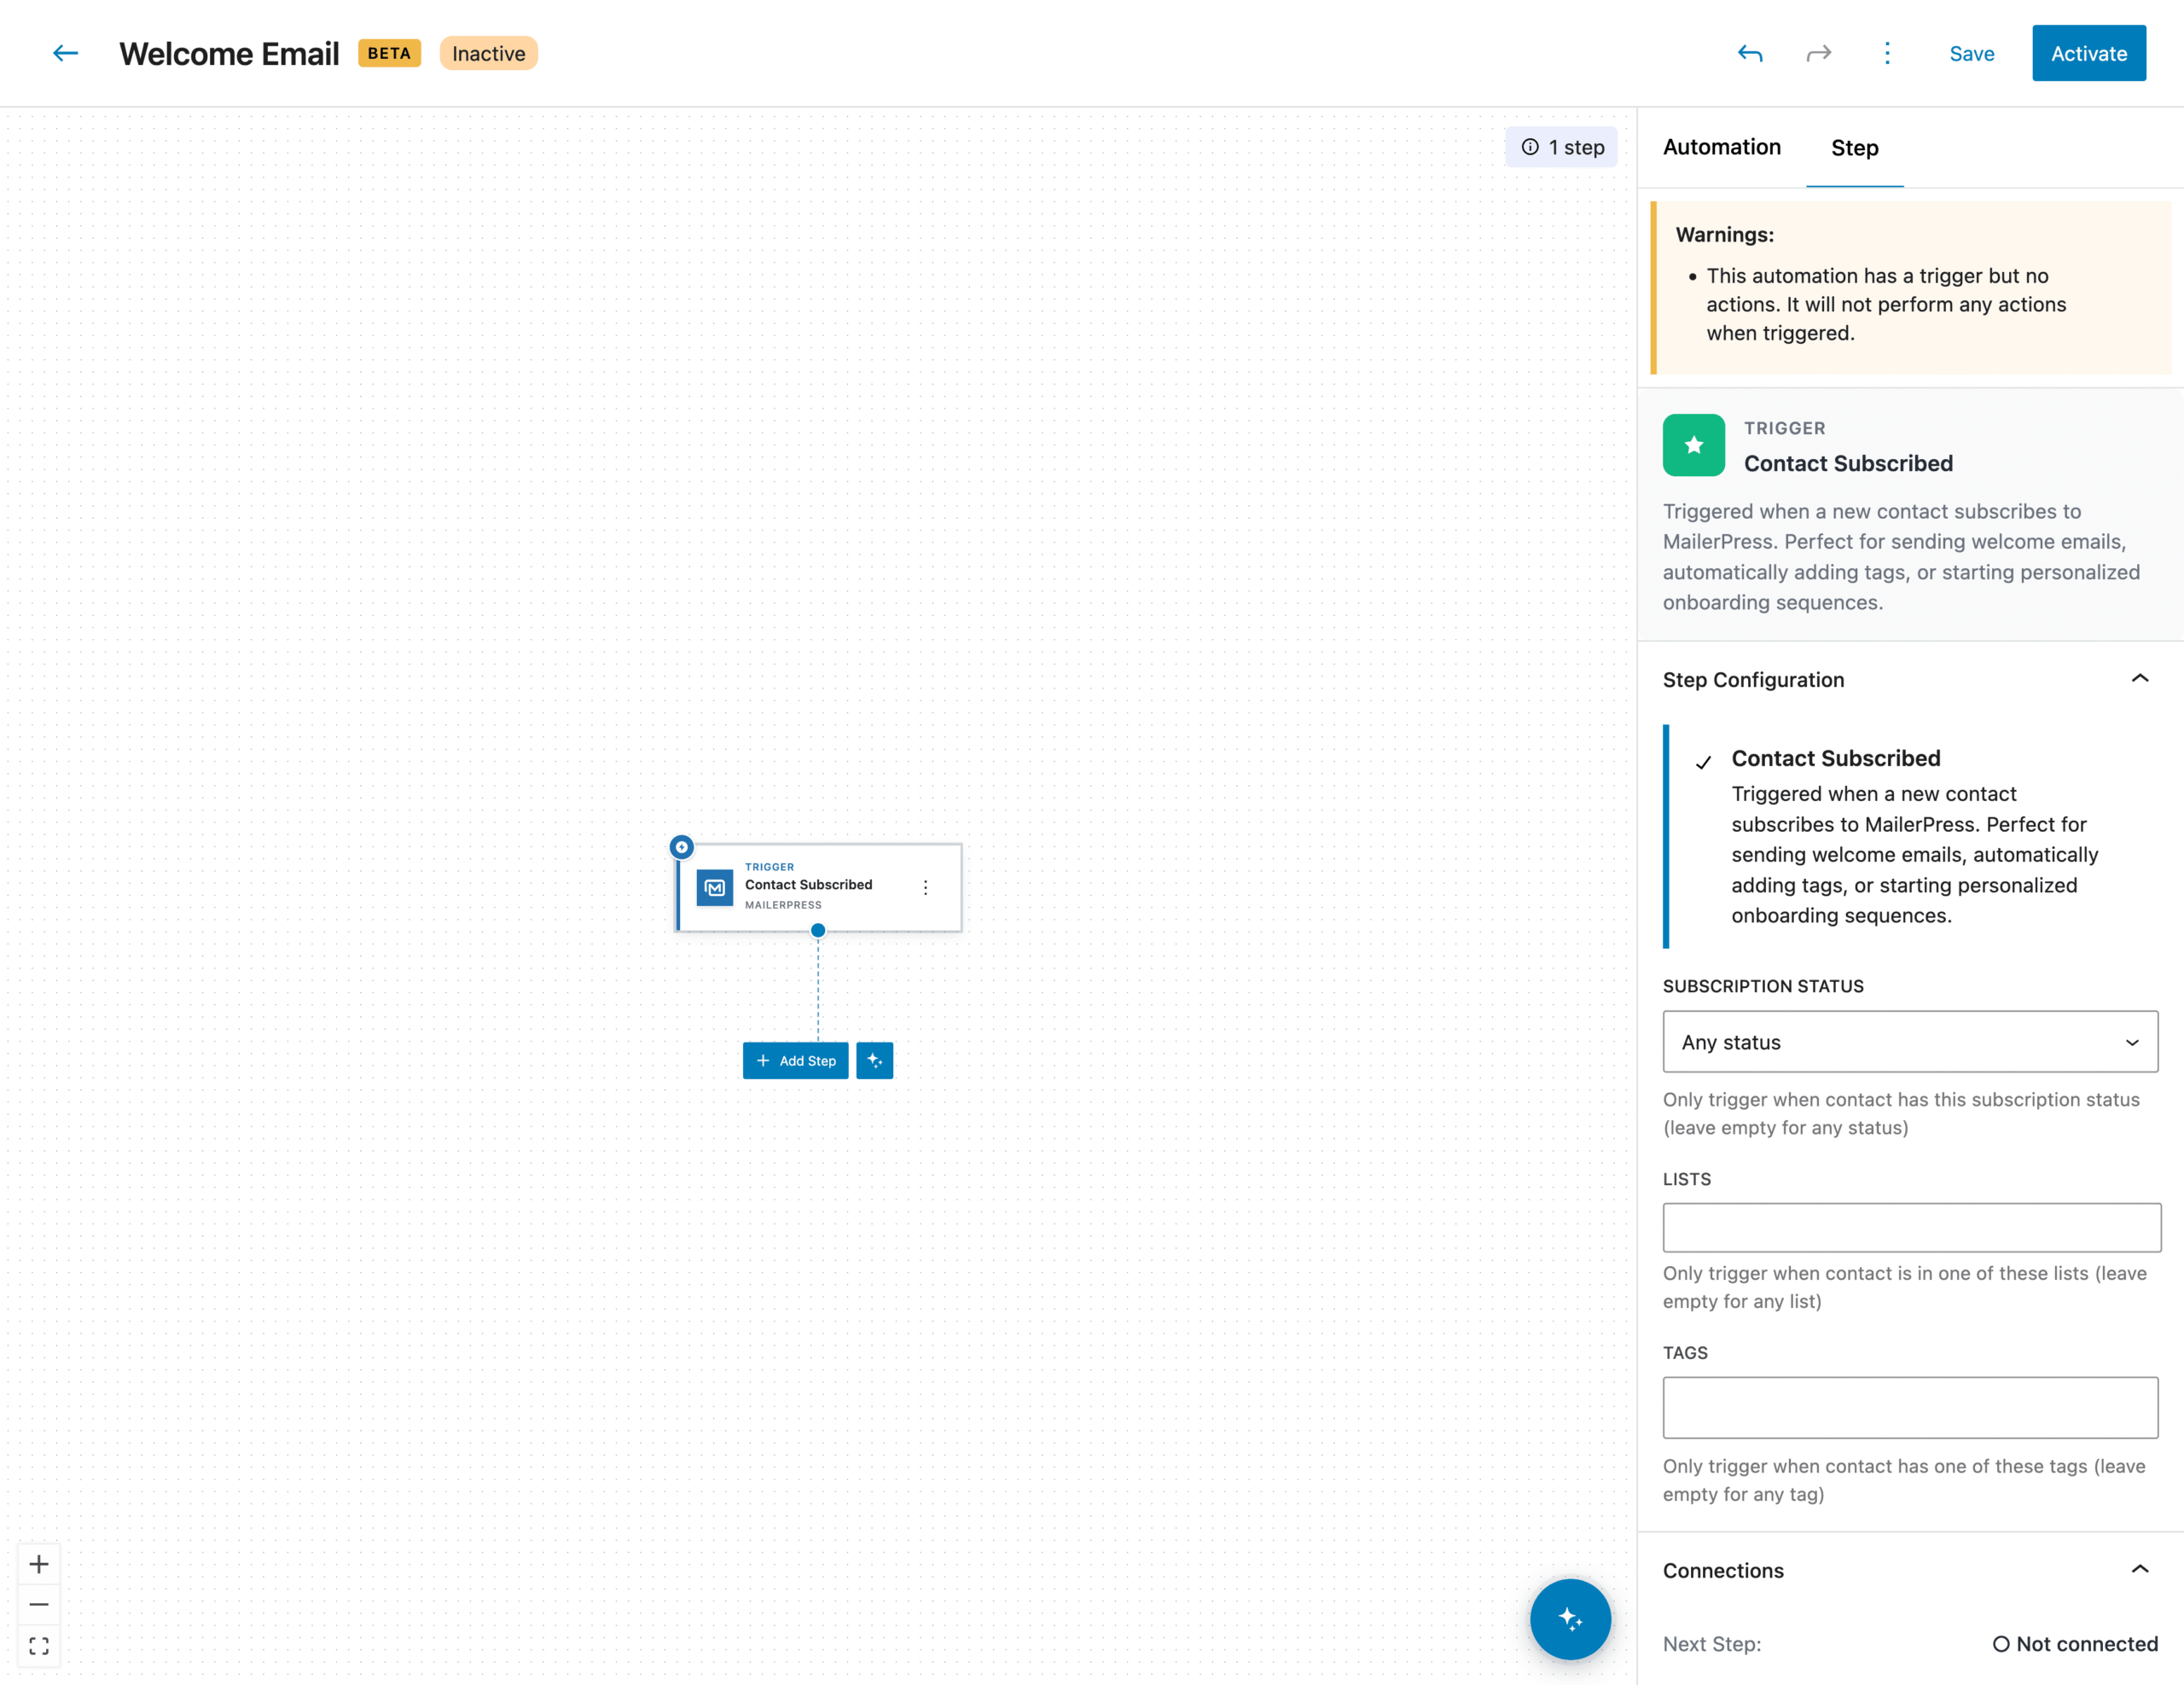
The trigger is now added to your workflow.
Second step: customize your trigger settings
Click on the newly added trigger to see its settings from the right panel.
Define all the desired settings, like those for the Contact Subscribed block:
- subscription status
- lists
- tags
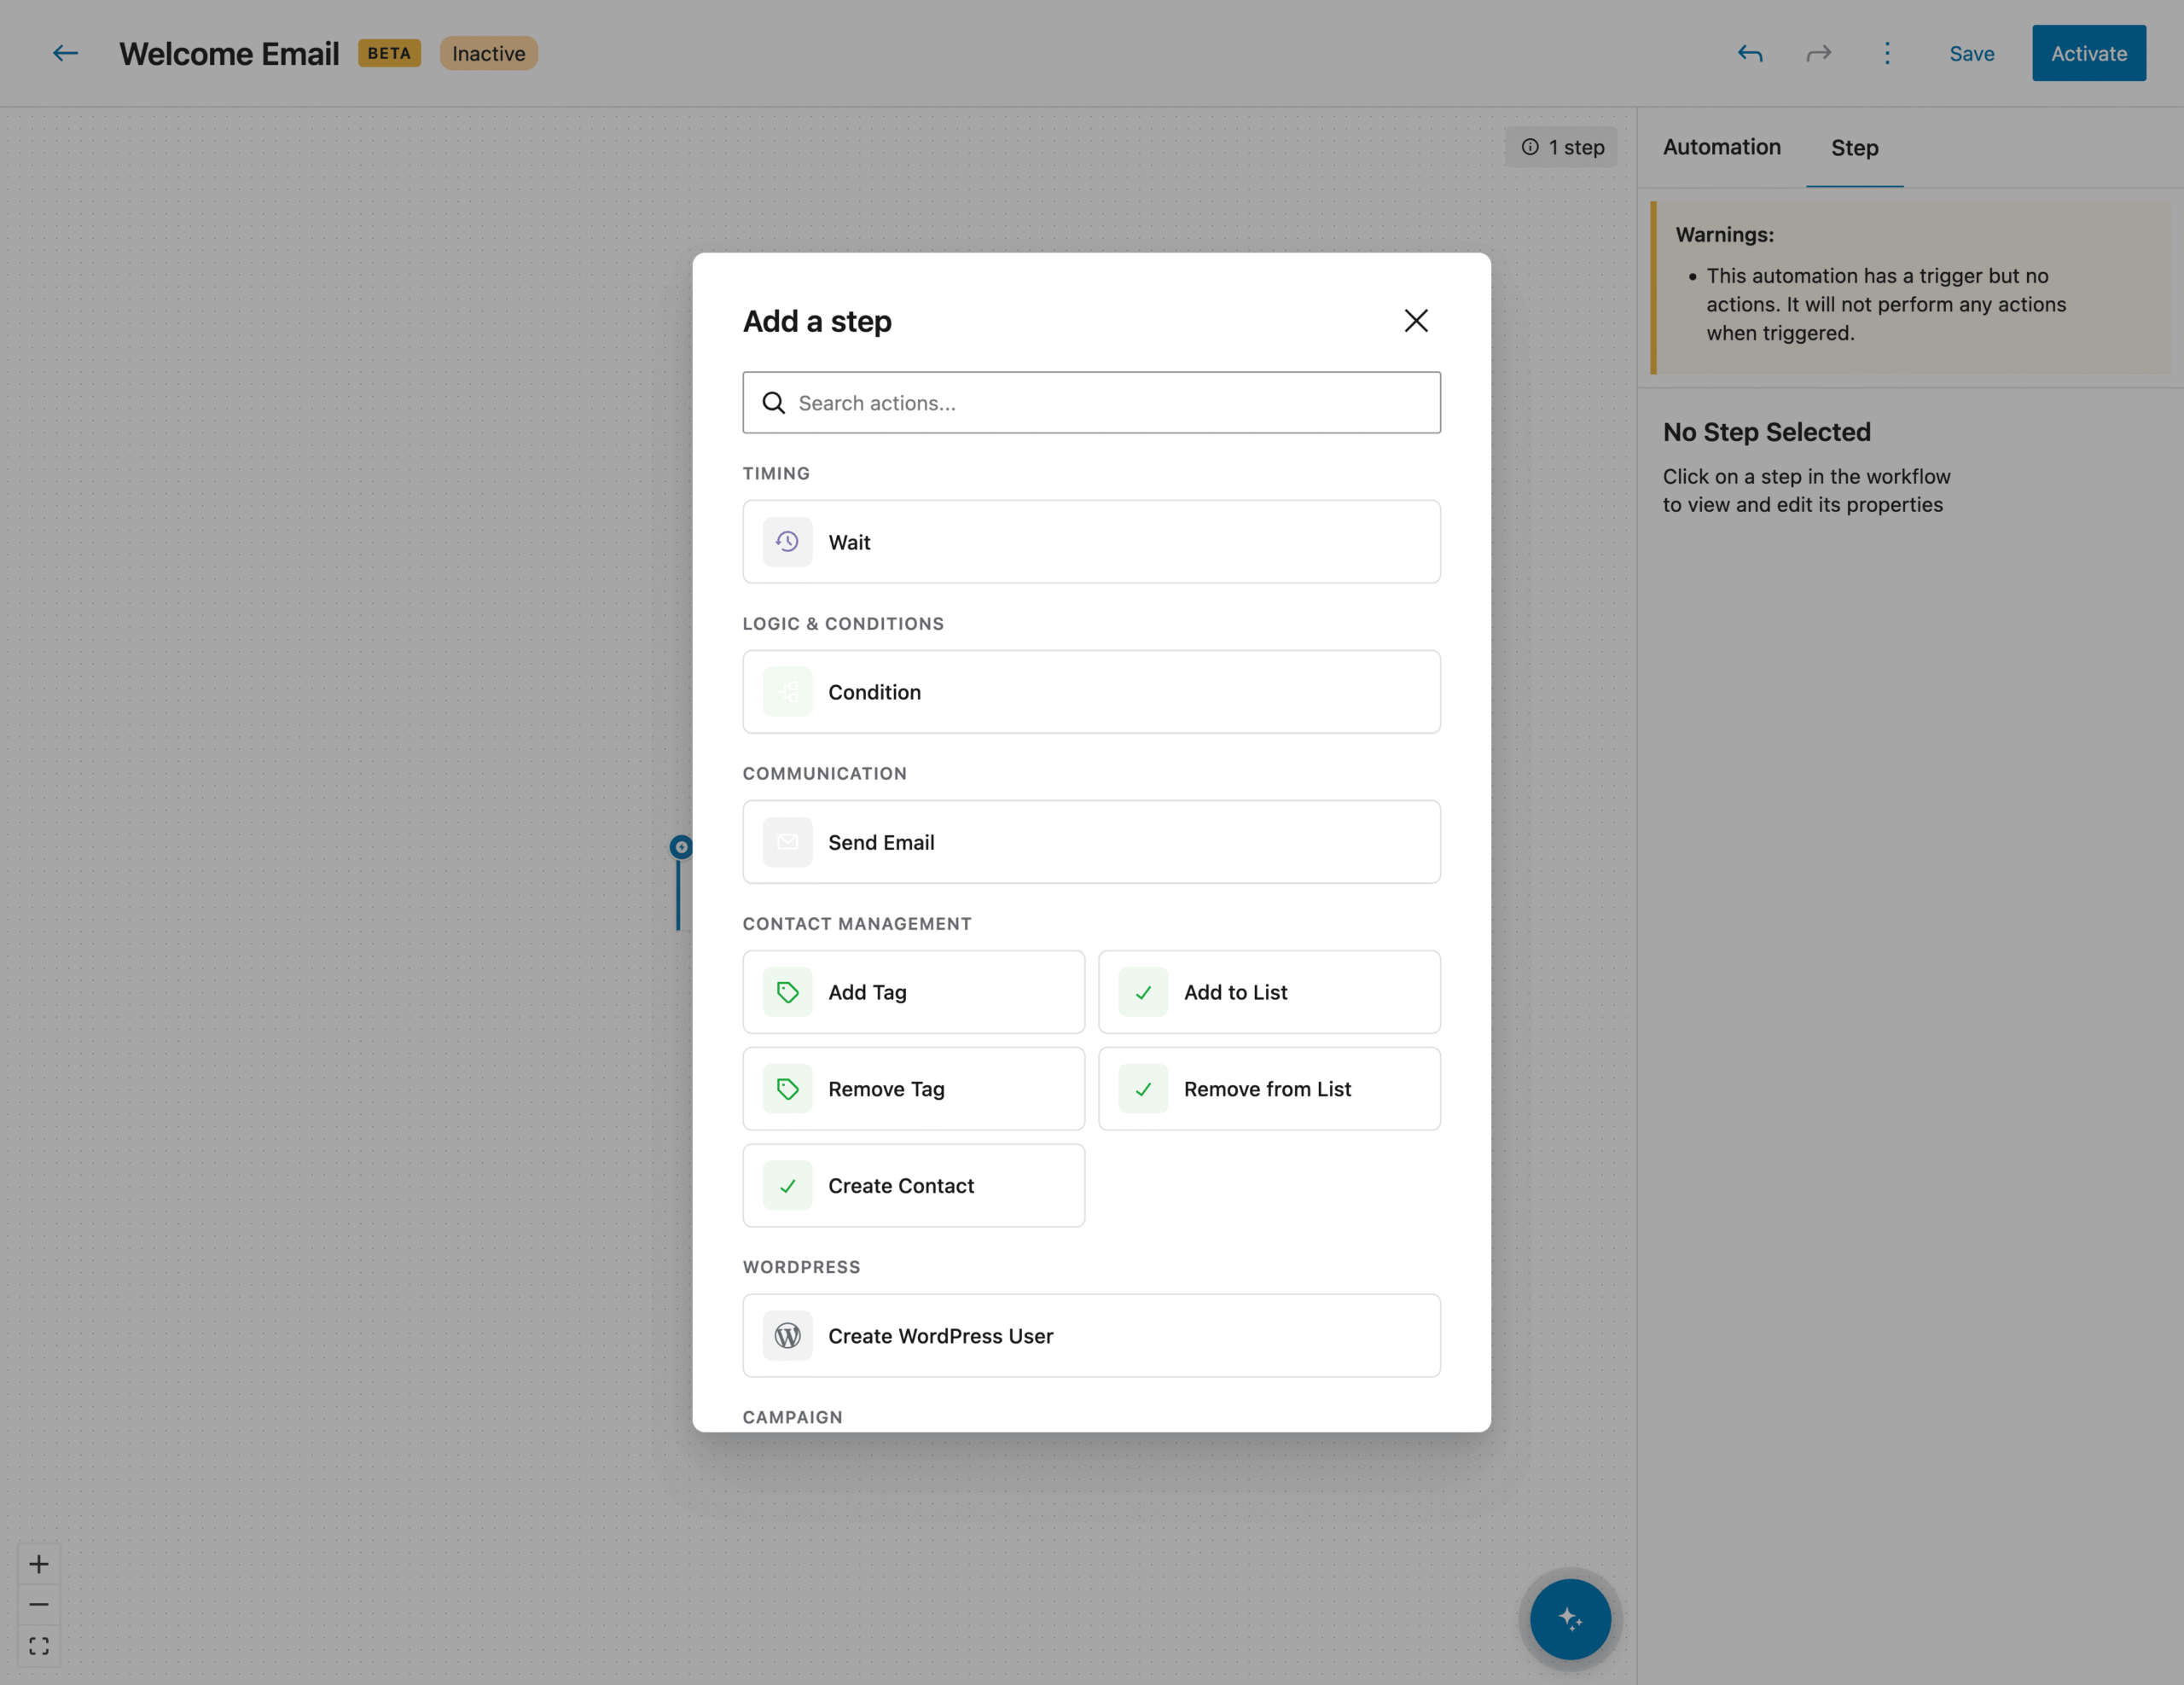
Third step: add your first action to your Workflow
Now we have a trigger set, we have to run an action.
Click the “+” icon below your first trigger.
The actions modal appears.
In our example, we’ll choose “Wait” under the Timing section.
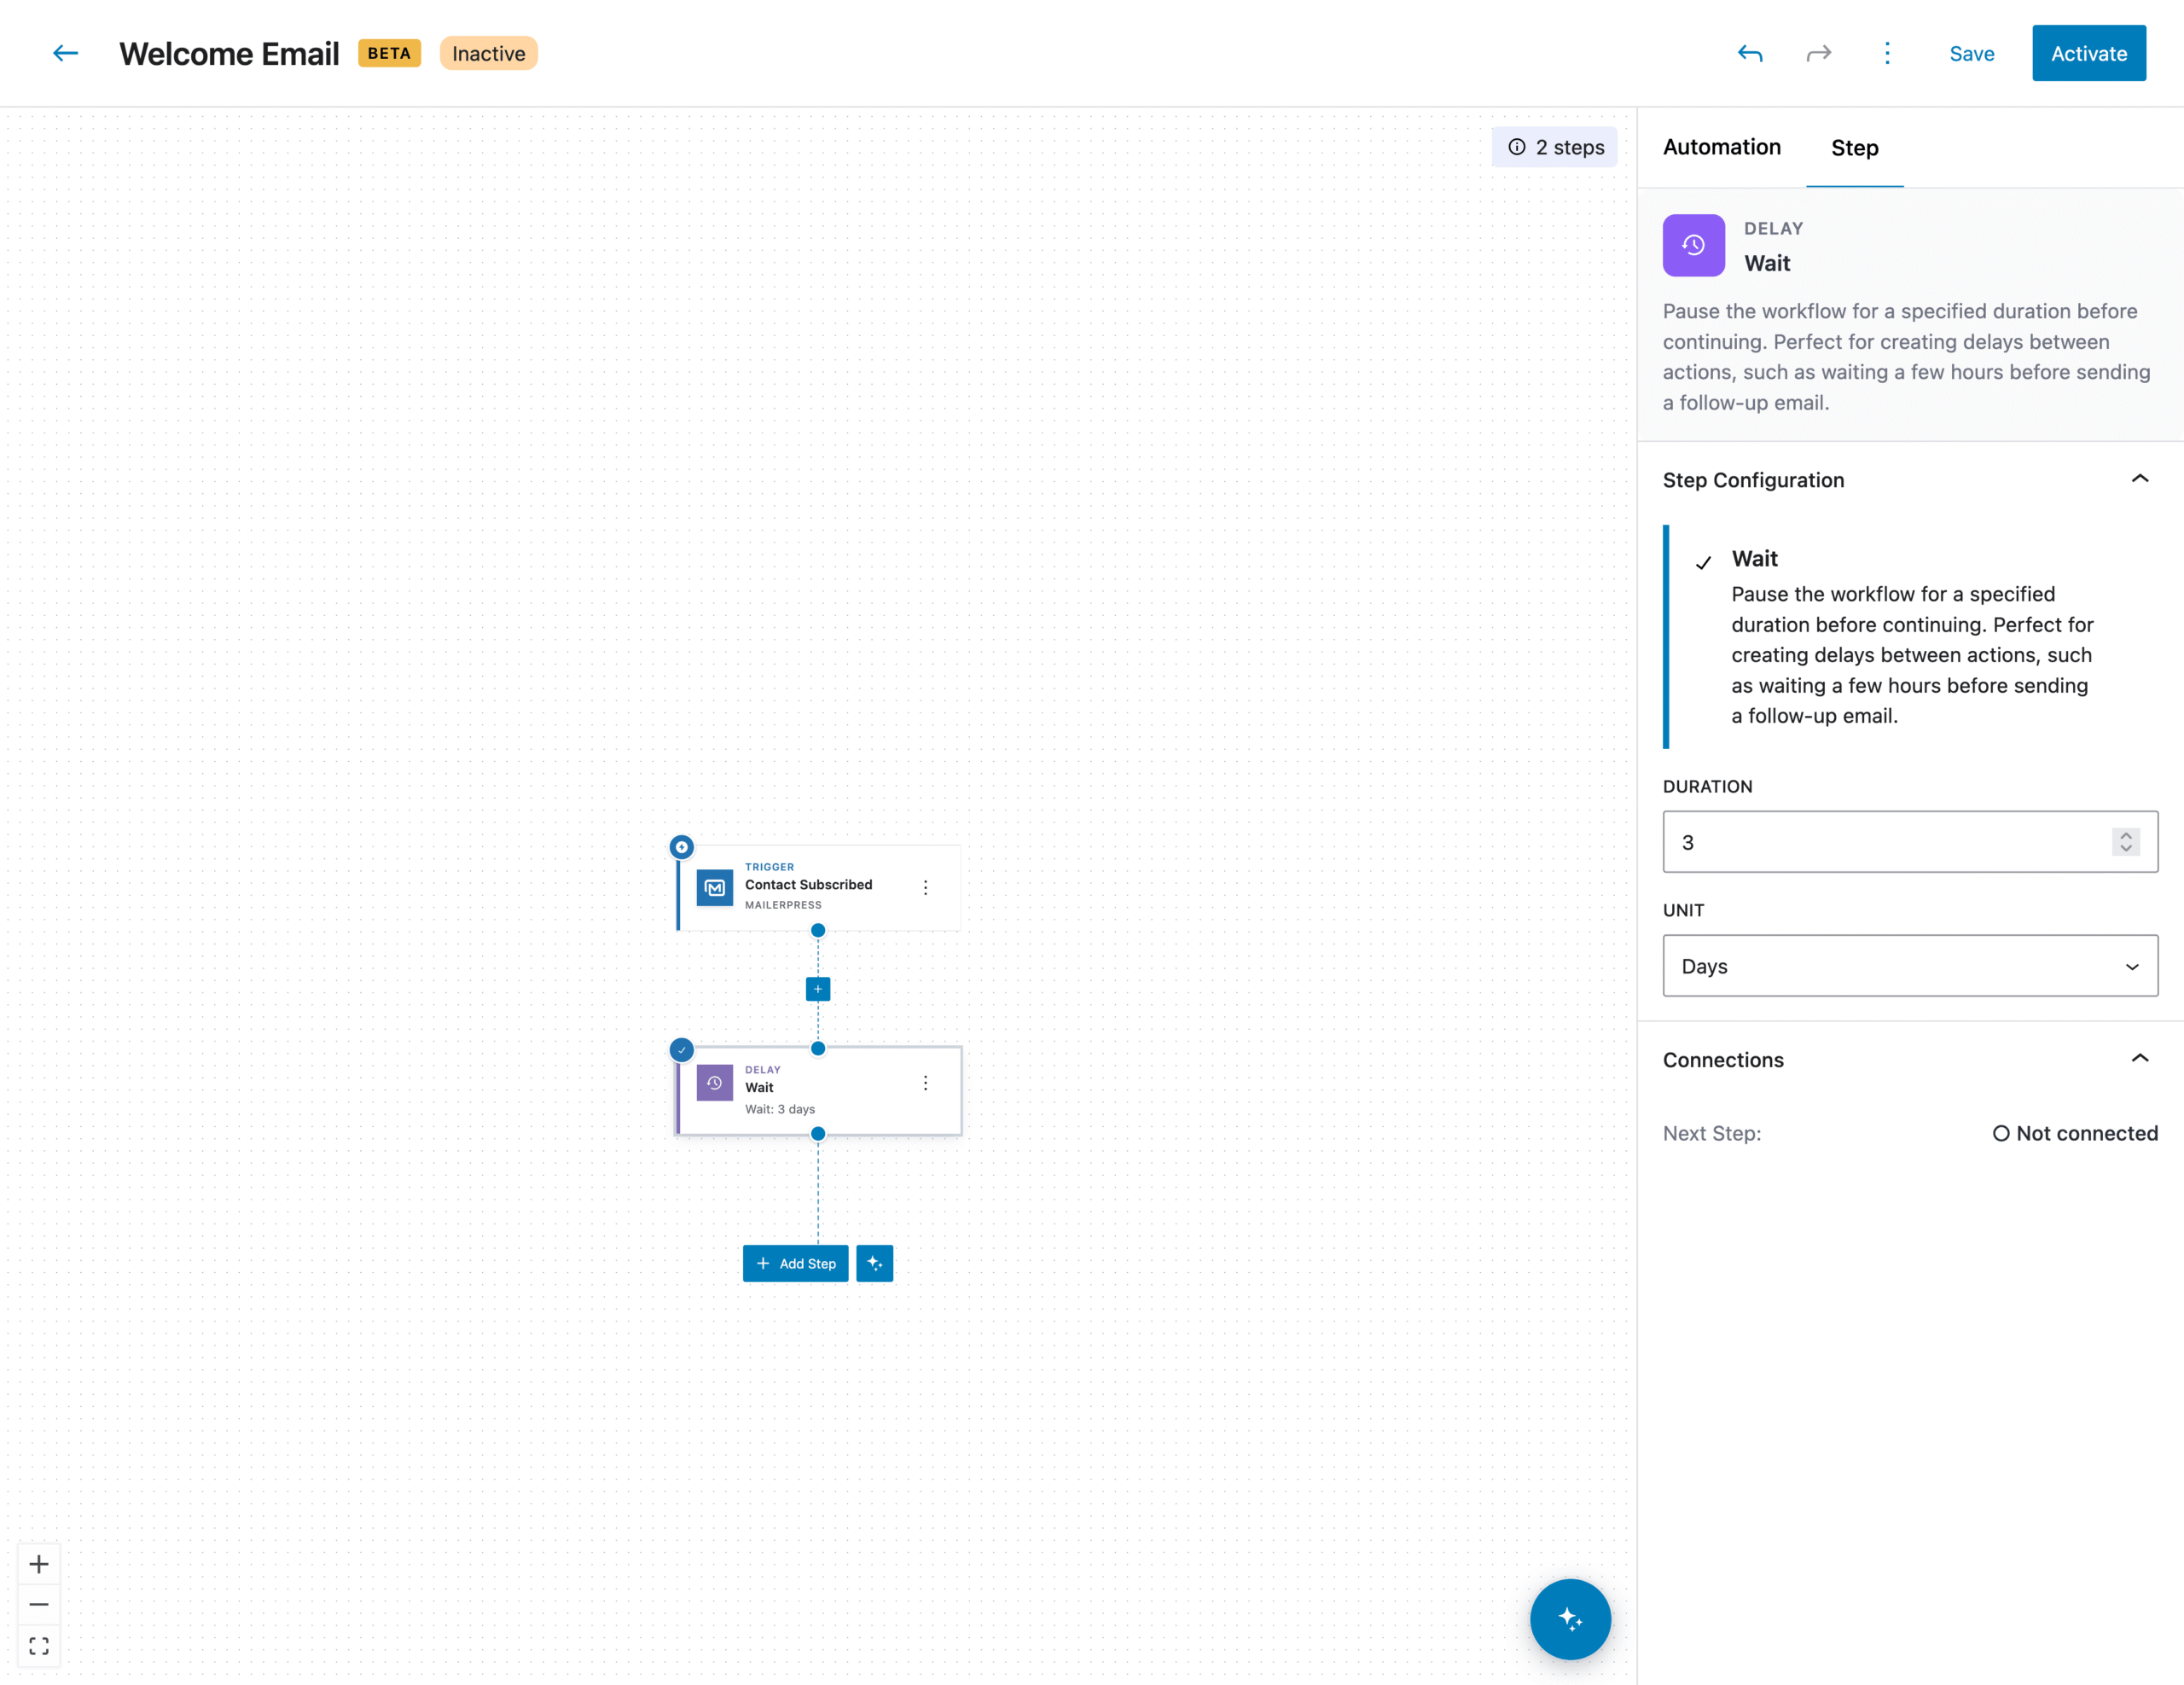
Fourth step: customize your action settings
Like with the trigger, click on your action, and define your desired settings.
Here we’ll set the duration and unit to “3 days“.
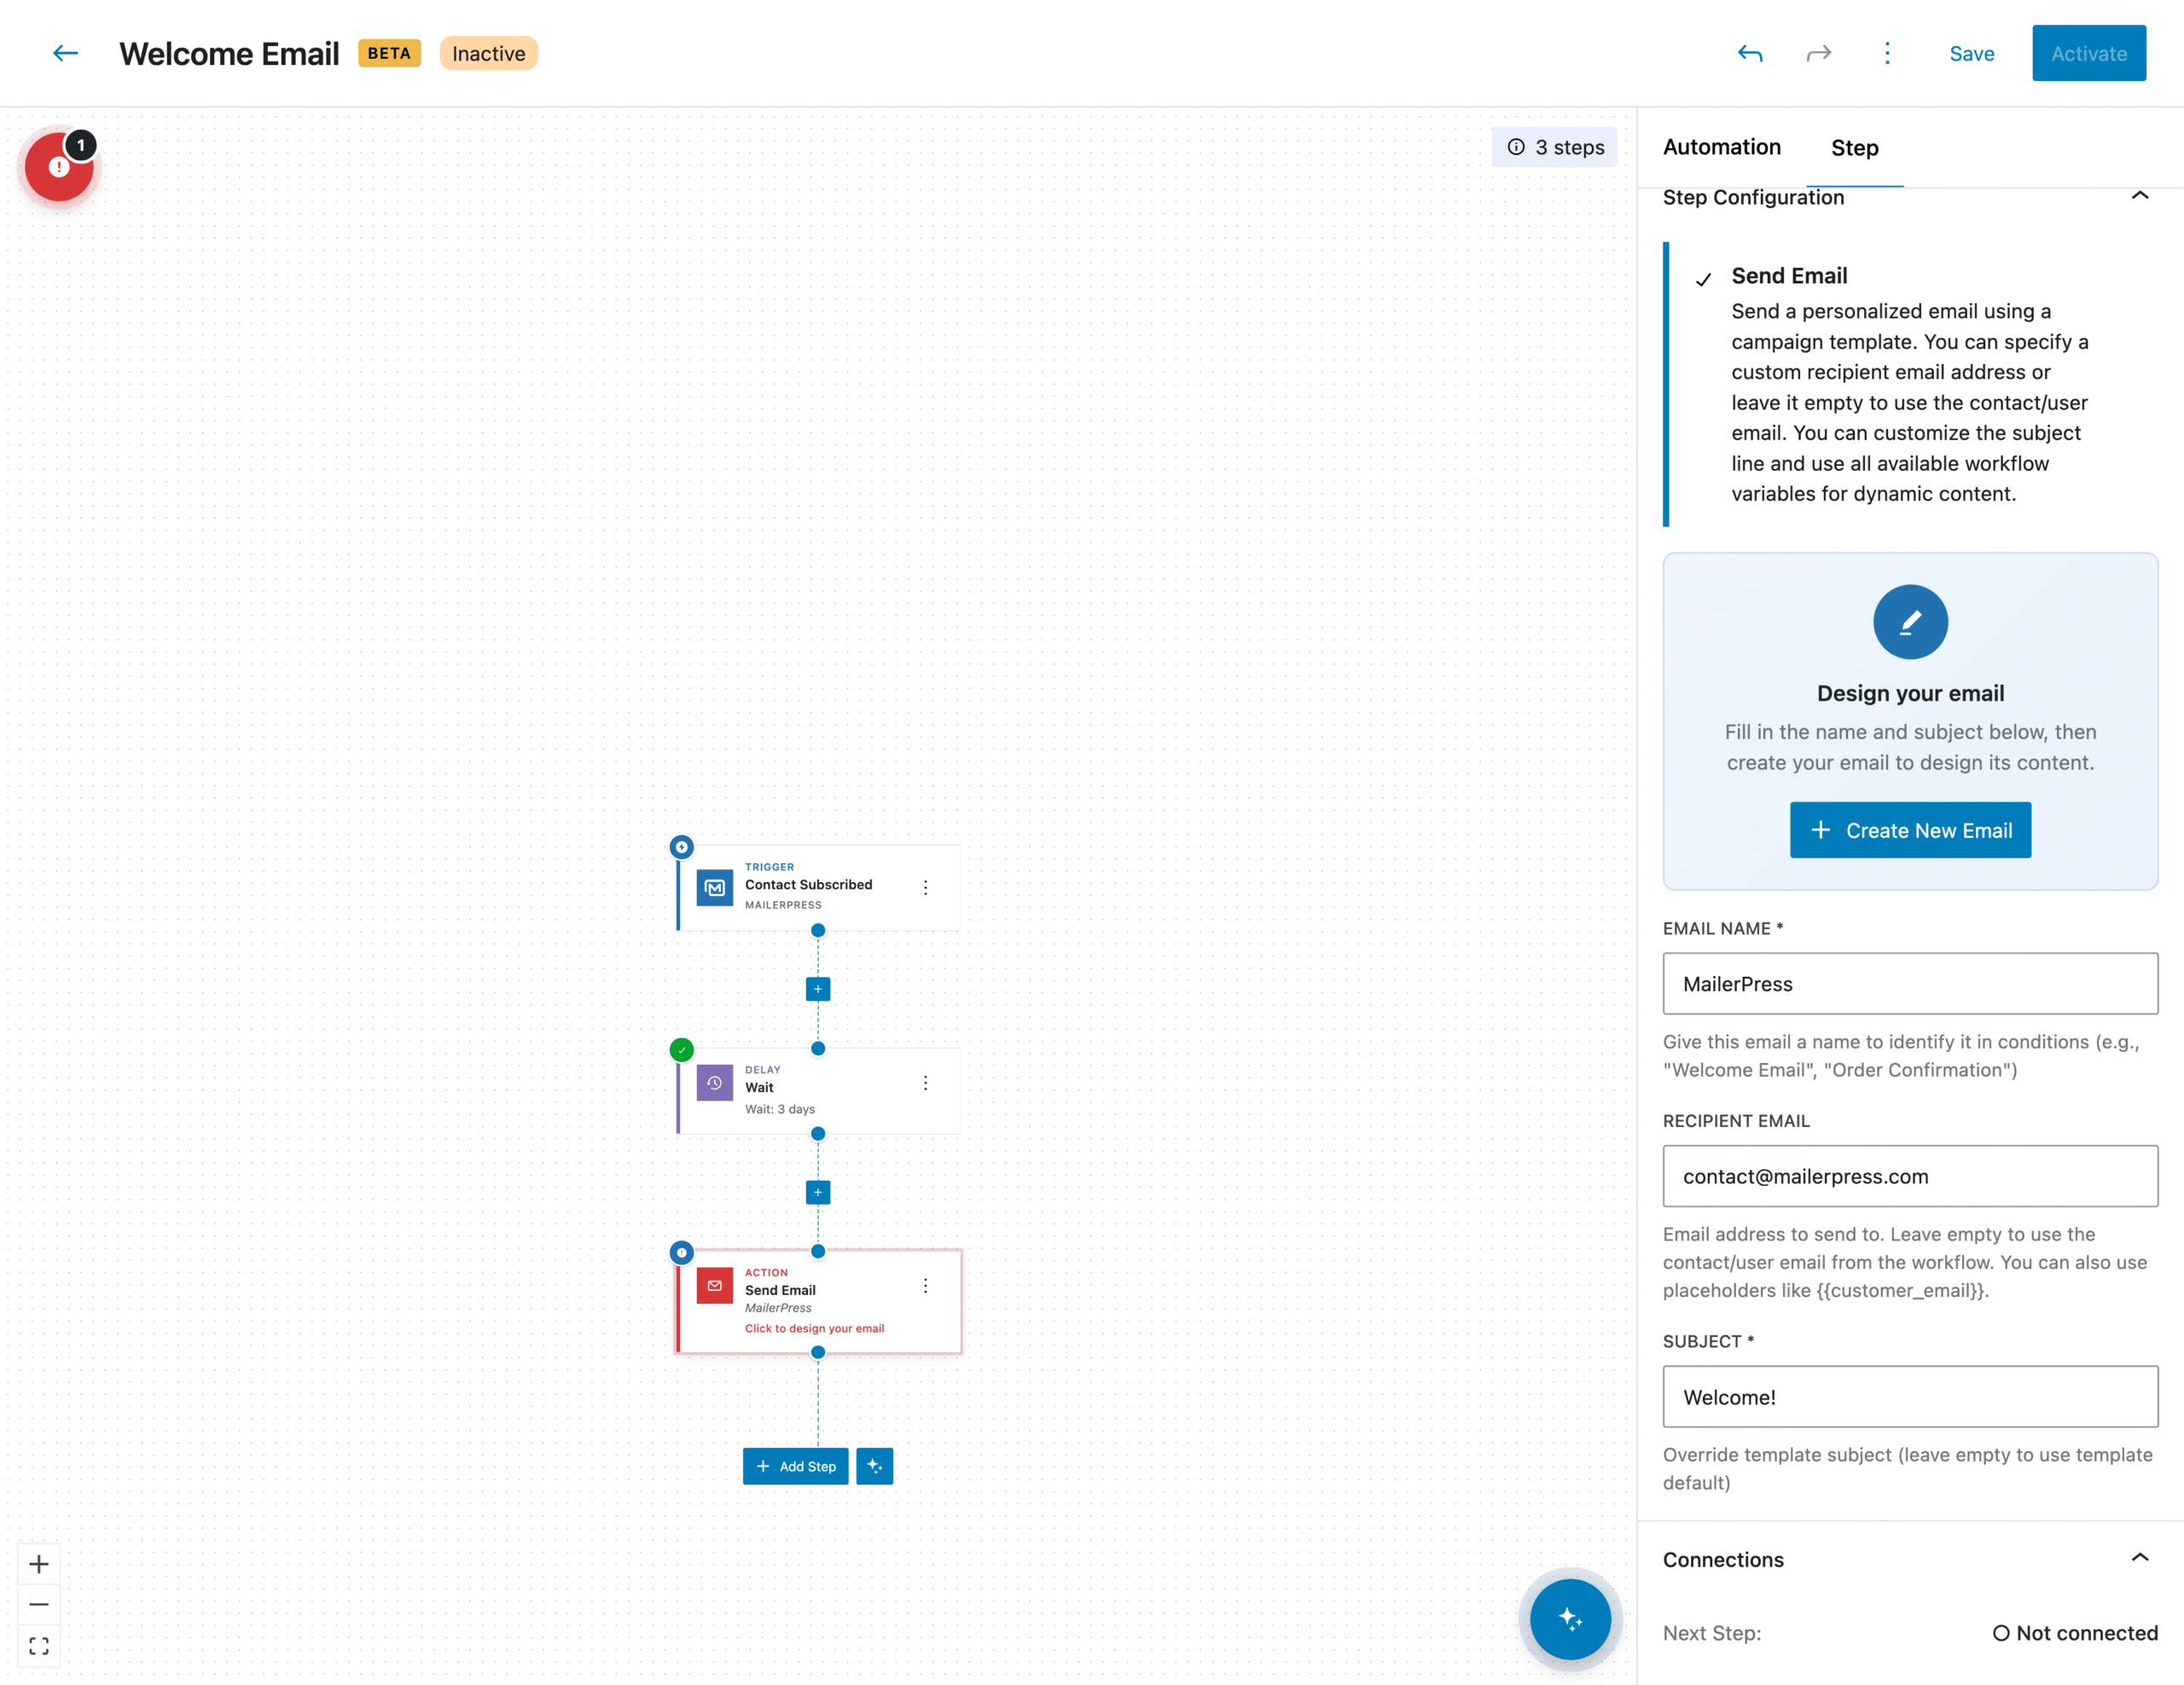
Fifth step: add a second action
Add a new Step to your workflow.
This time will choose “Send email” under Communication section.
From the right panel, enter:
- your email name: “MailerPress“
- your recipient email:
[email protected](leave this empty to dynamically use the contact/user email) - and your email subject: “Welcome!“
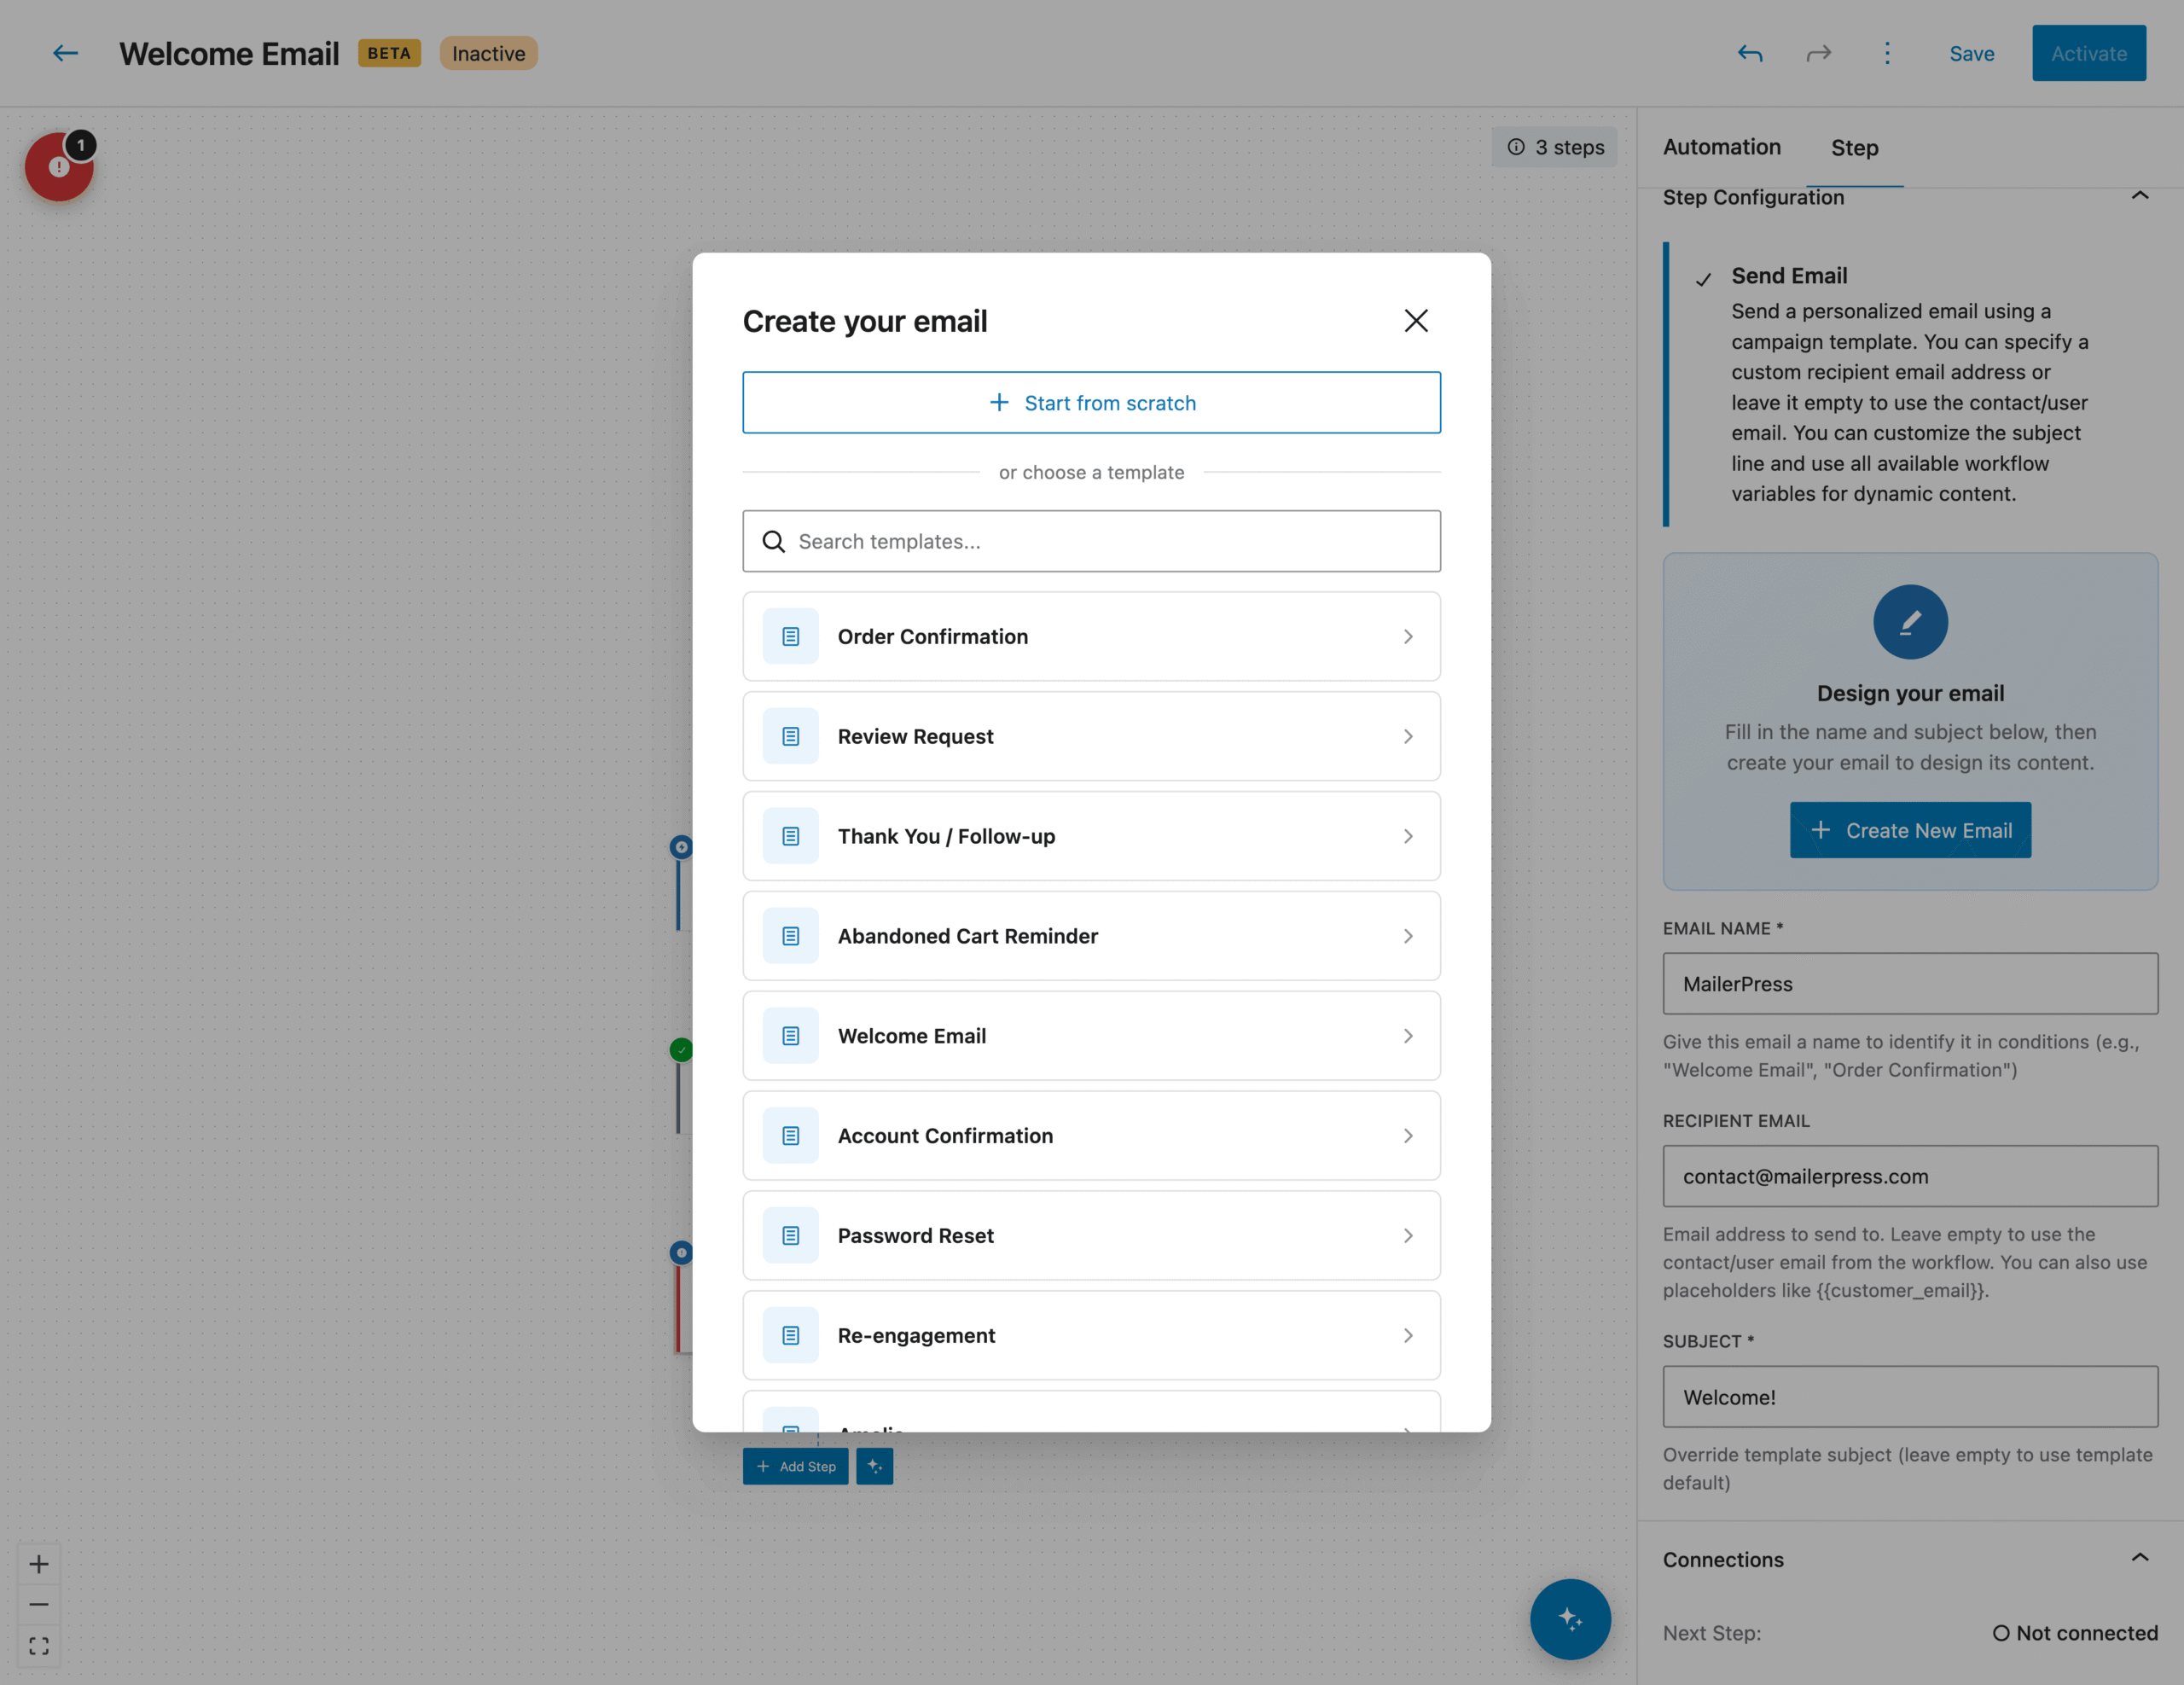
Sixth step: create your email
Now you have entered these informations, you can click the “Create New Email” button.
A new modal appears to help you quickly get started with an email template like “Order Confirmation“, “Welcome Email“, “Thank you / Follow-up” and so on.
You can also start from scratch.
In our example, we’ll use the Welcome Email.
The email campaign editor will open so you can build your email. Please refer to this guide to learn how to create your email.
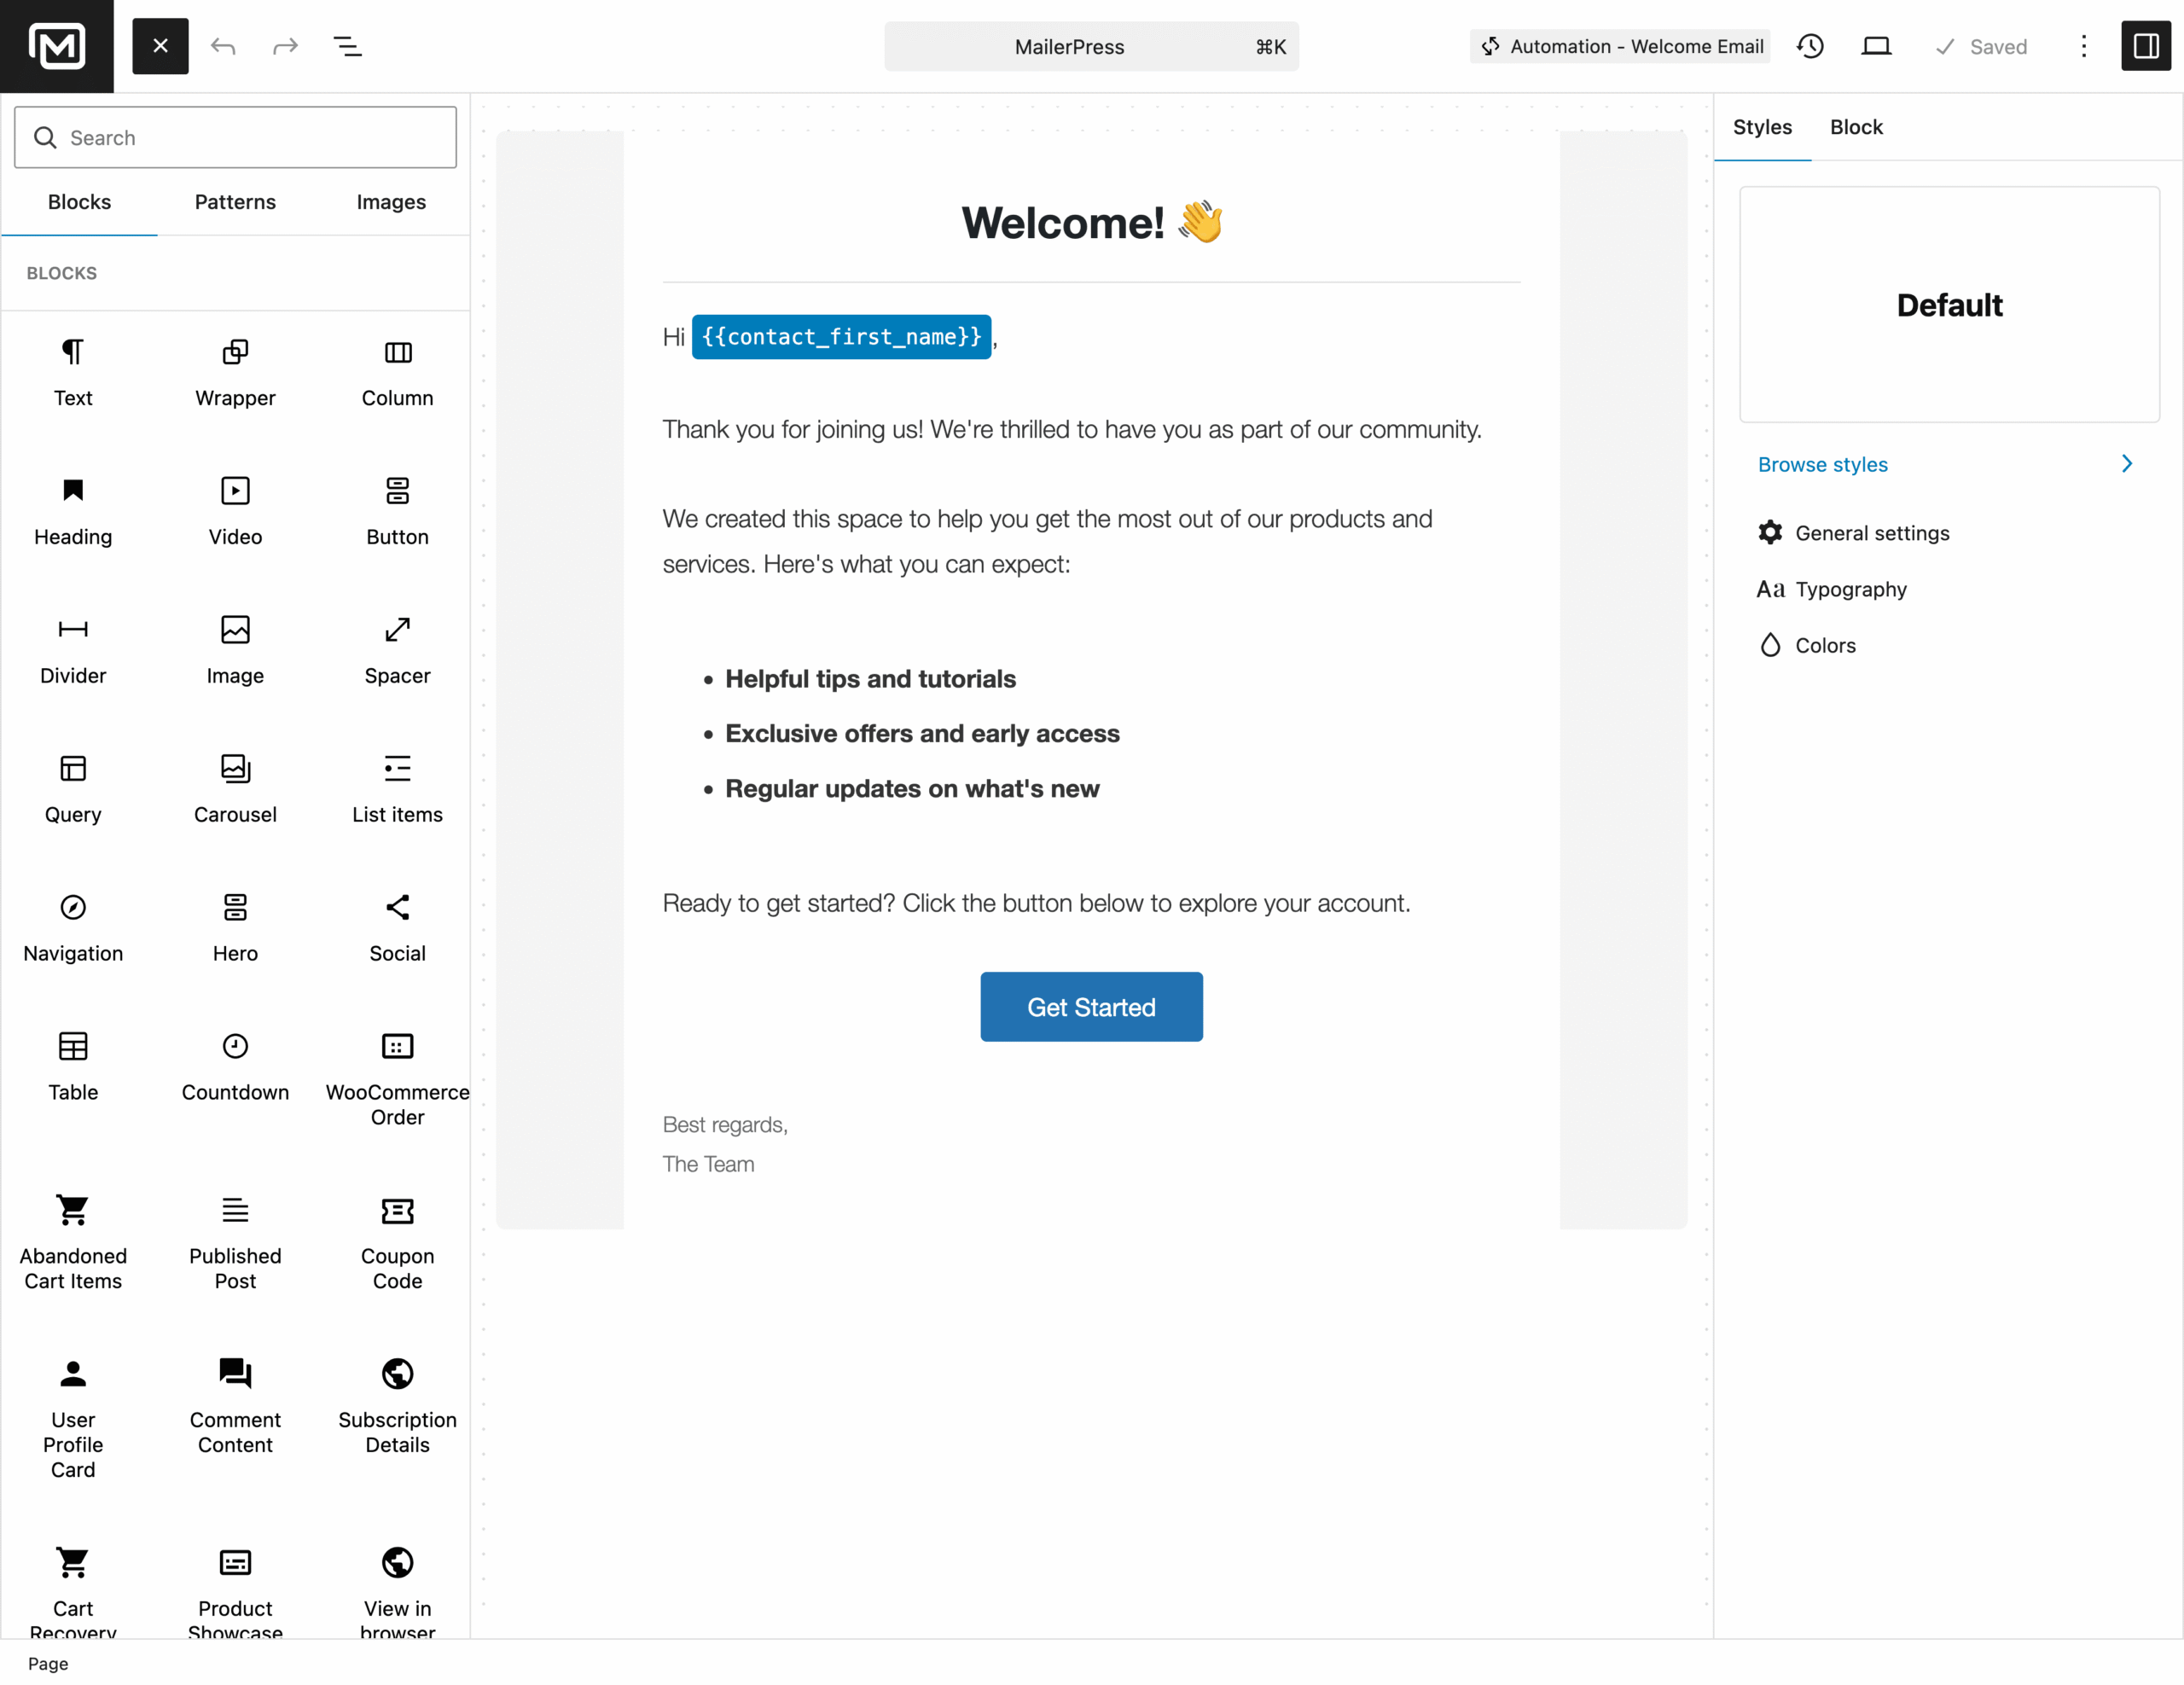
Click the MailerPress logo from the top toolbar to get back to your automation workflow.
Final step: activate your workflow
Just click the Activate button from the top toolbar. The automation is now marked as “Active“.
Go back to your automations list by clicking the back arrow from the top toolbar, then “All automations” link from the main menu.
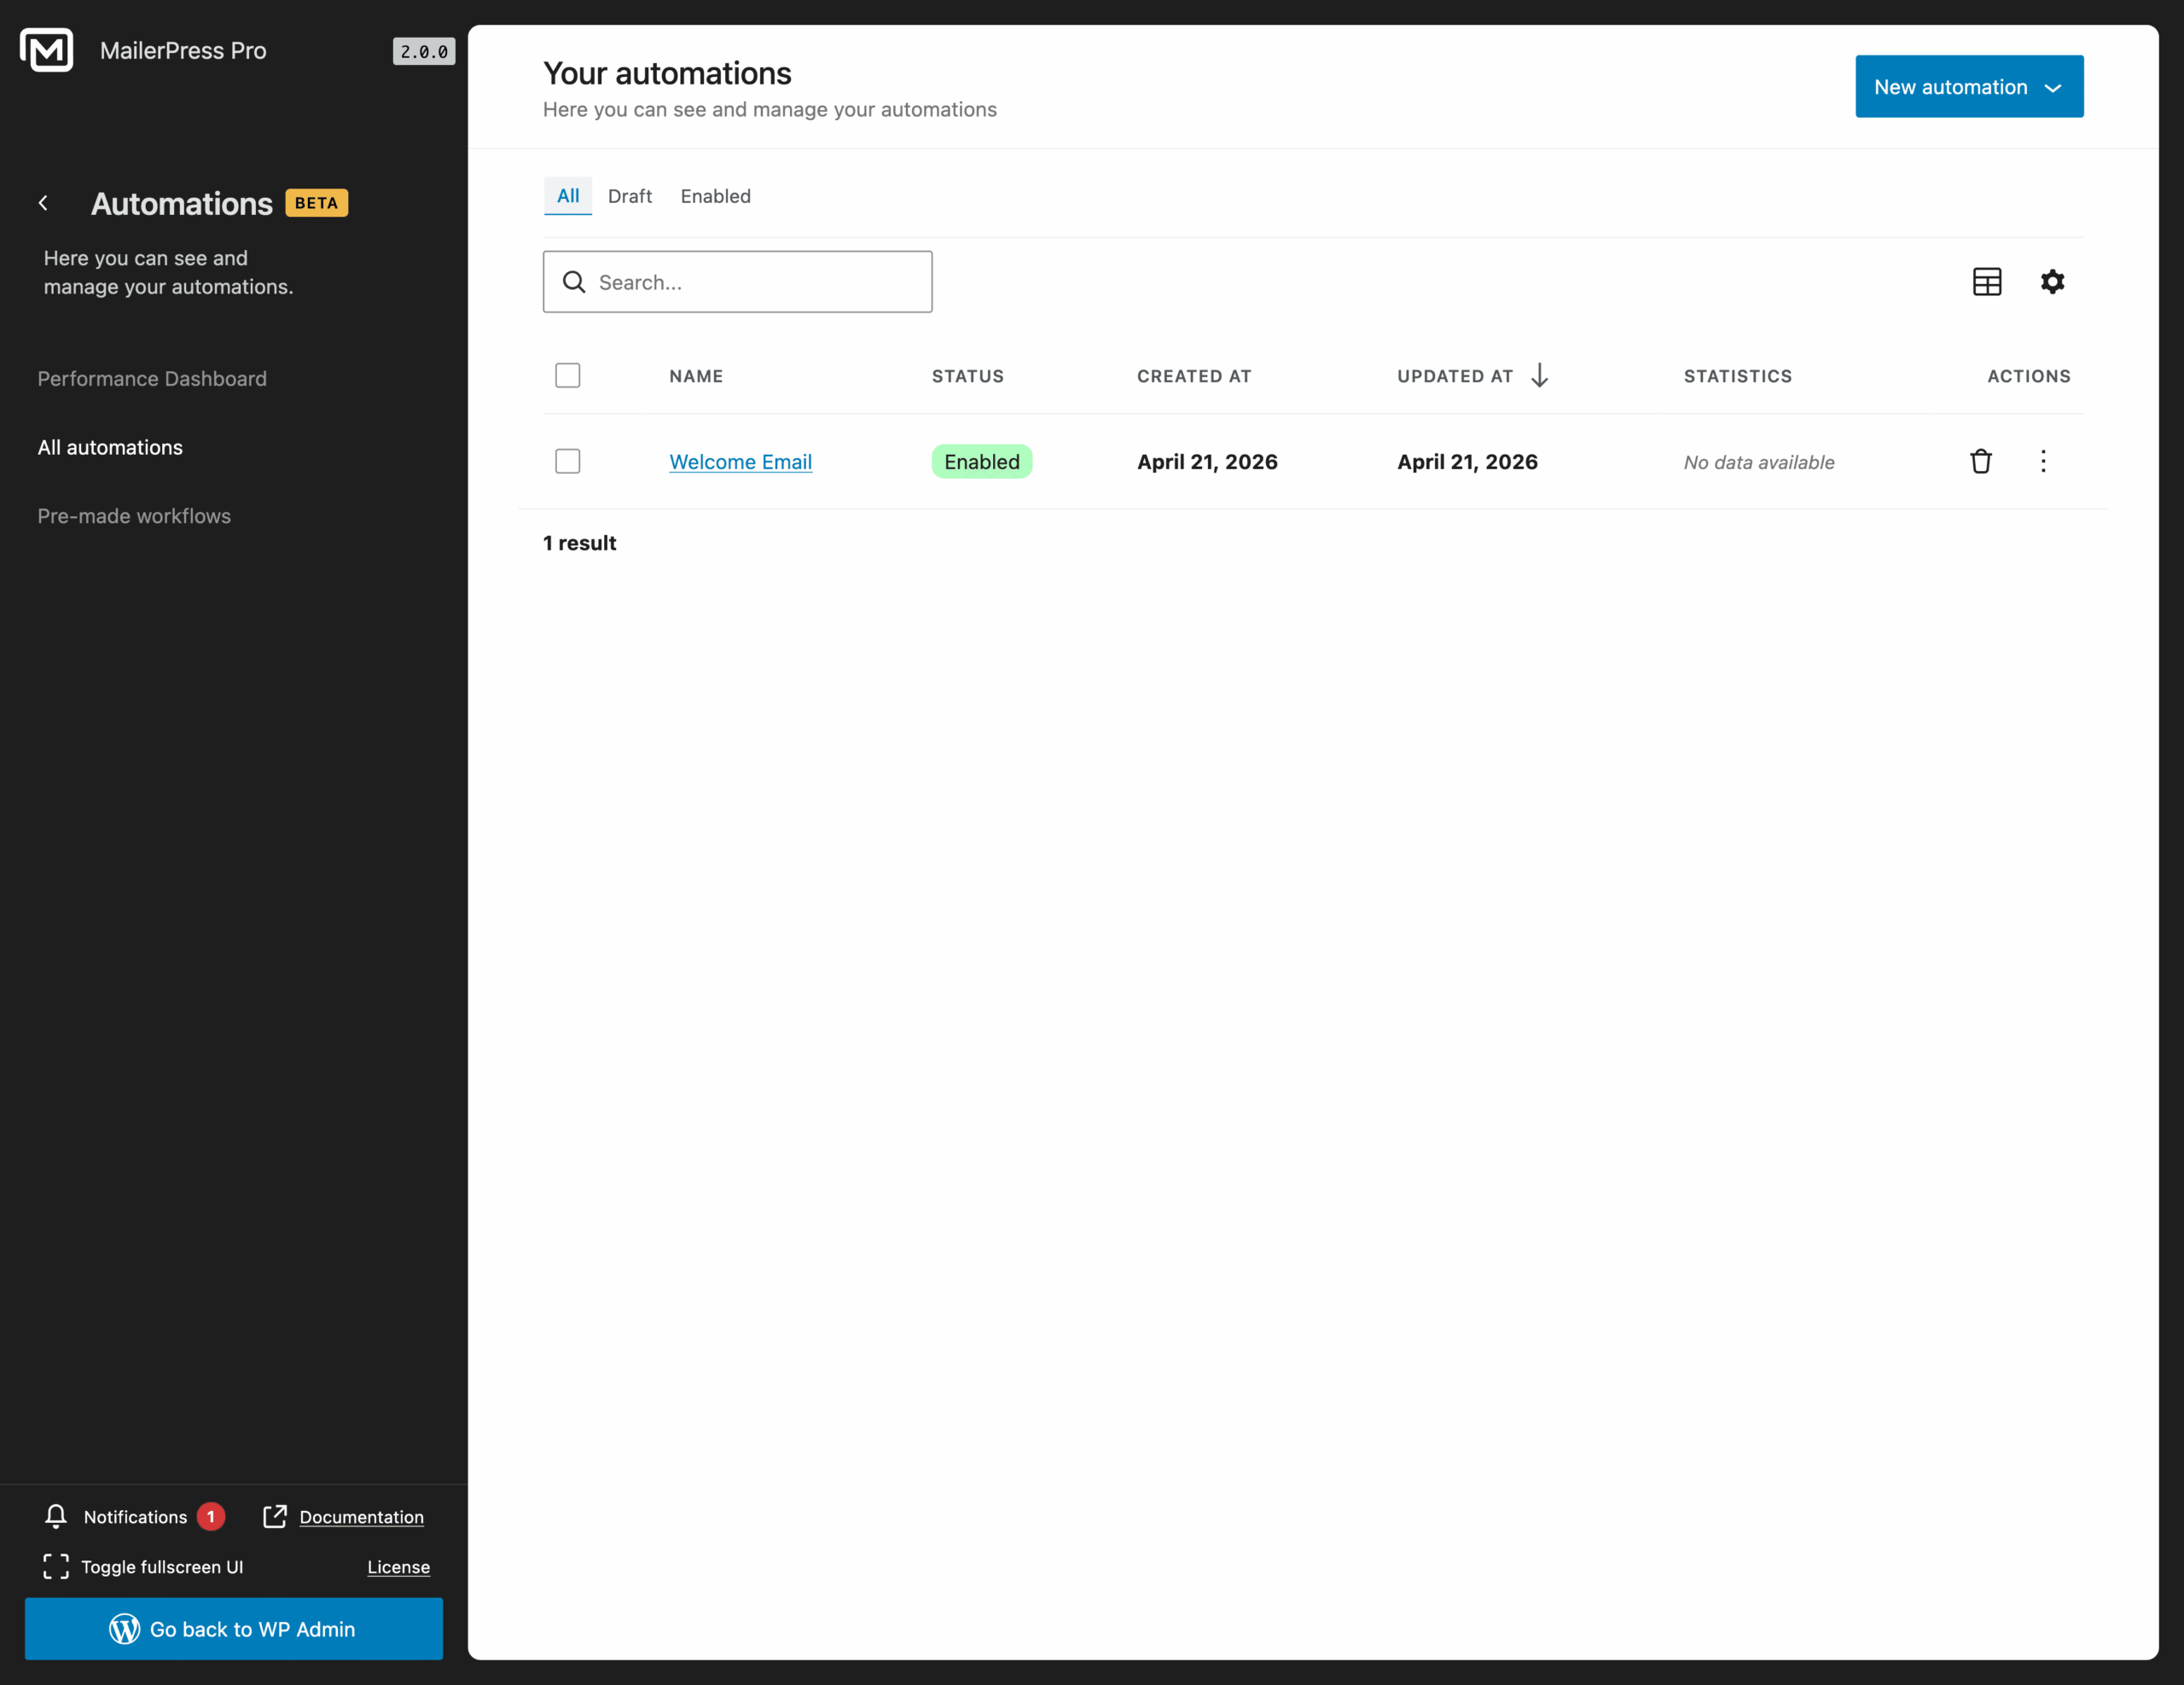
Congratulations!
You can now see your newly activated automation.
We strongly recommend testing it as a regular visitor to make sure everything works as expected before going live.
This helps confirm that the trigger is correct, the steps run in the right order, and emails are sent properly.
It also lets you catch any configuration issues early and adjust the workflow if needed.