Here are the steps to send your email campaigns with SendGrid and manage bounce tracking in MailerPress using the SendGrid API.
#1 – Sign in to SendGrid
Create an account on SendGrid website or sign in to an existing one.
Go to Settings, API Keys, Create API Key button.
Enter a API key name and choose Full Access.
Click Create and View button.
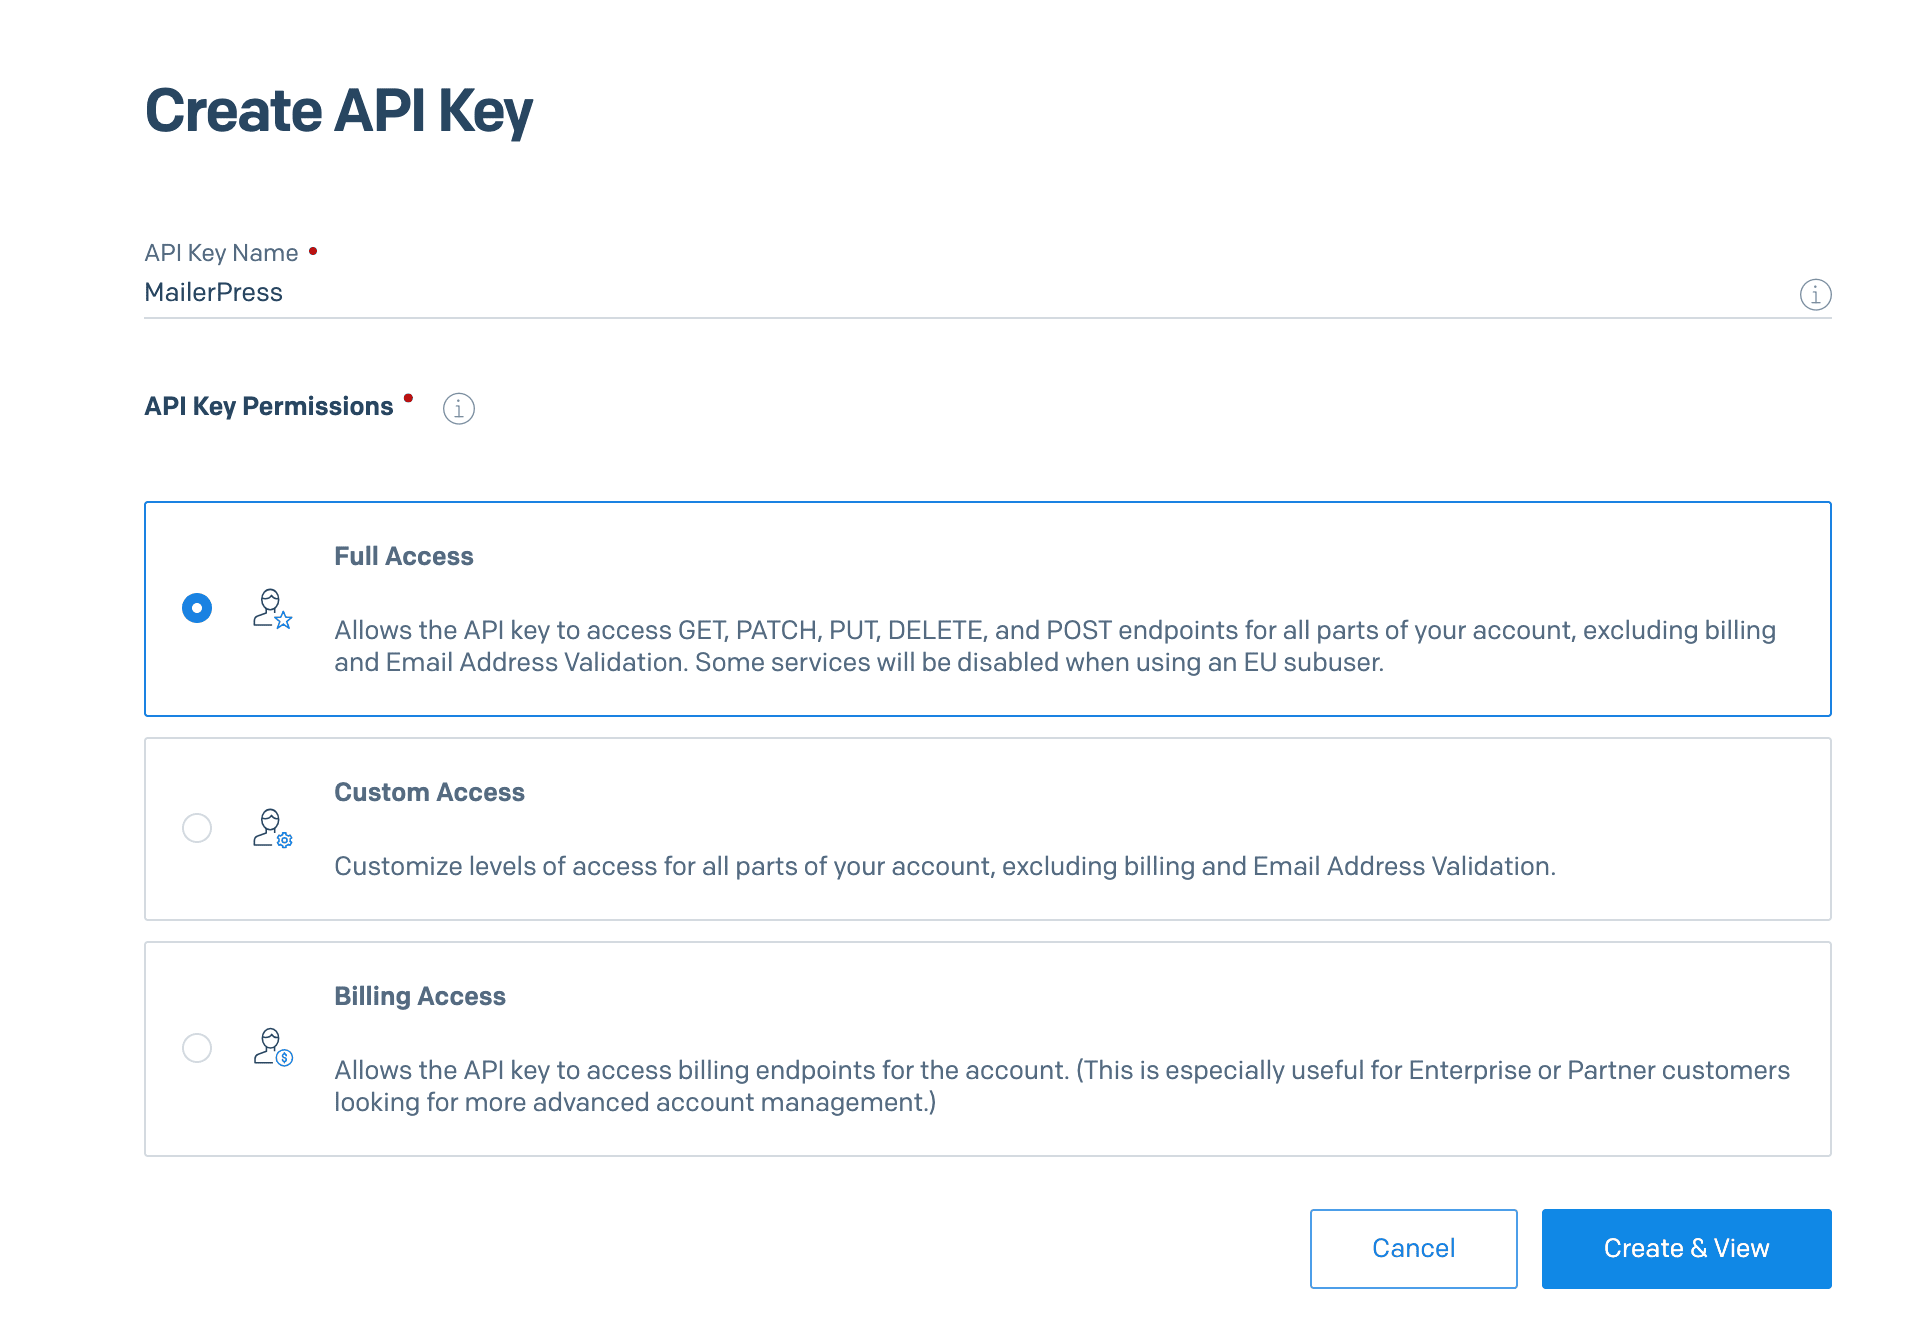
Copy the API key to your clipboard.
#2 – Link your site with SendGrid API
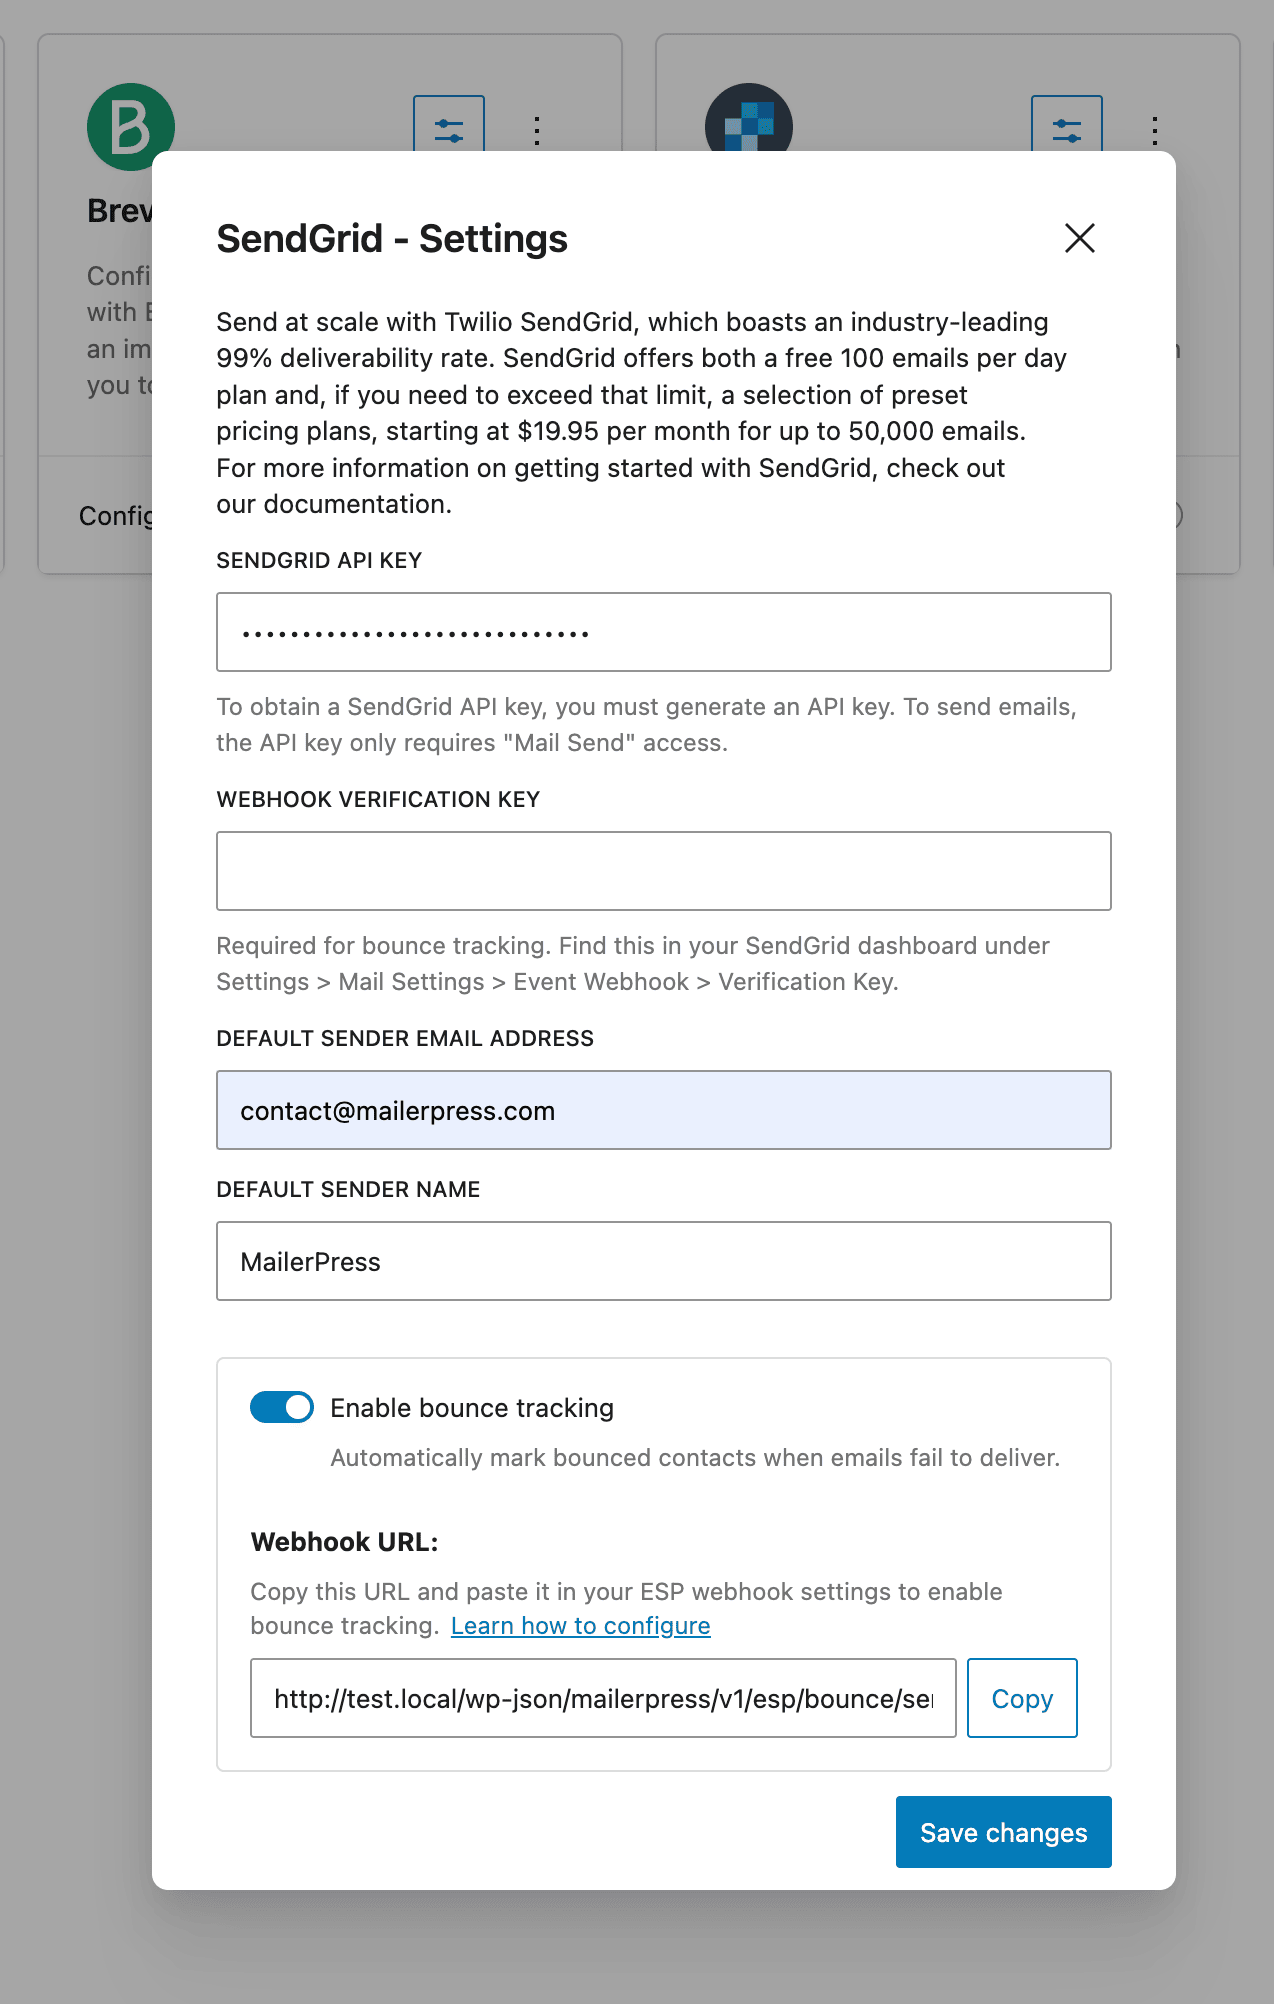
Paste the new API key to your WordPress admin, MailerPress, Integrations, Email Service Providers, SendGrid (click the Settings icon from the dedicated card), API key field.
If it’s not already done, enter a default email address and name for the sender.
Save changes.
#3 – Enable bounce tracking
Open again the SendGrid modal, and check Enable bounce tracking.
Copy the webhook URL.
Go to your SendGrid account, Settings, Mail Settings, Webhook Settings, Event Webhook.
Click Create a new webhook button.
From the modal, enter a Friendly name, paste the webhook URL to the Post URL field, and check Bounced.
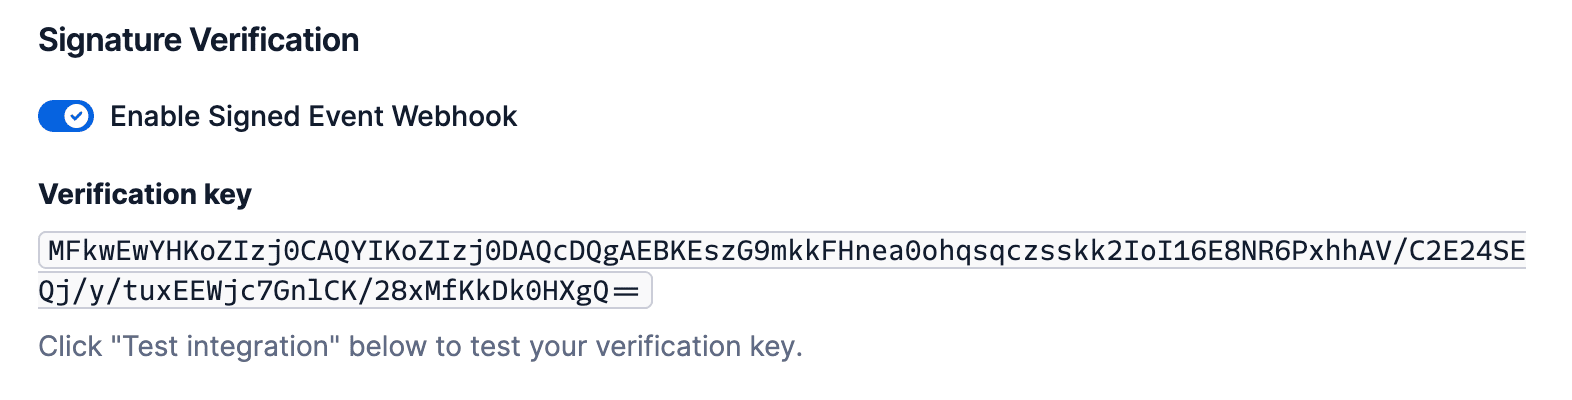
Also check Signature Verification toggle.
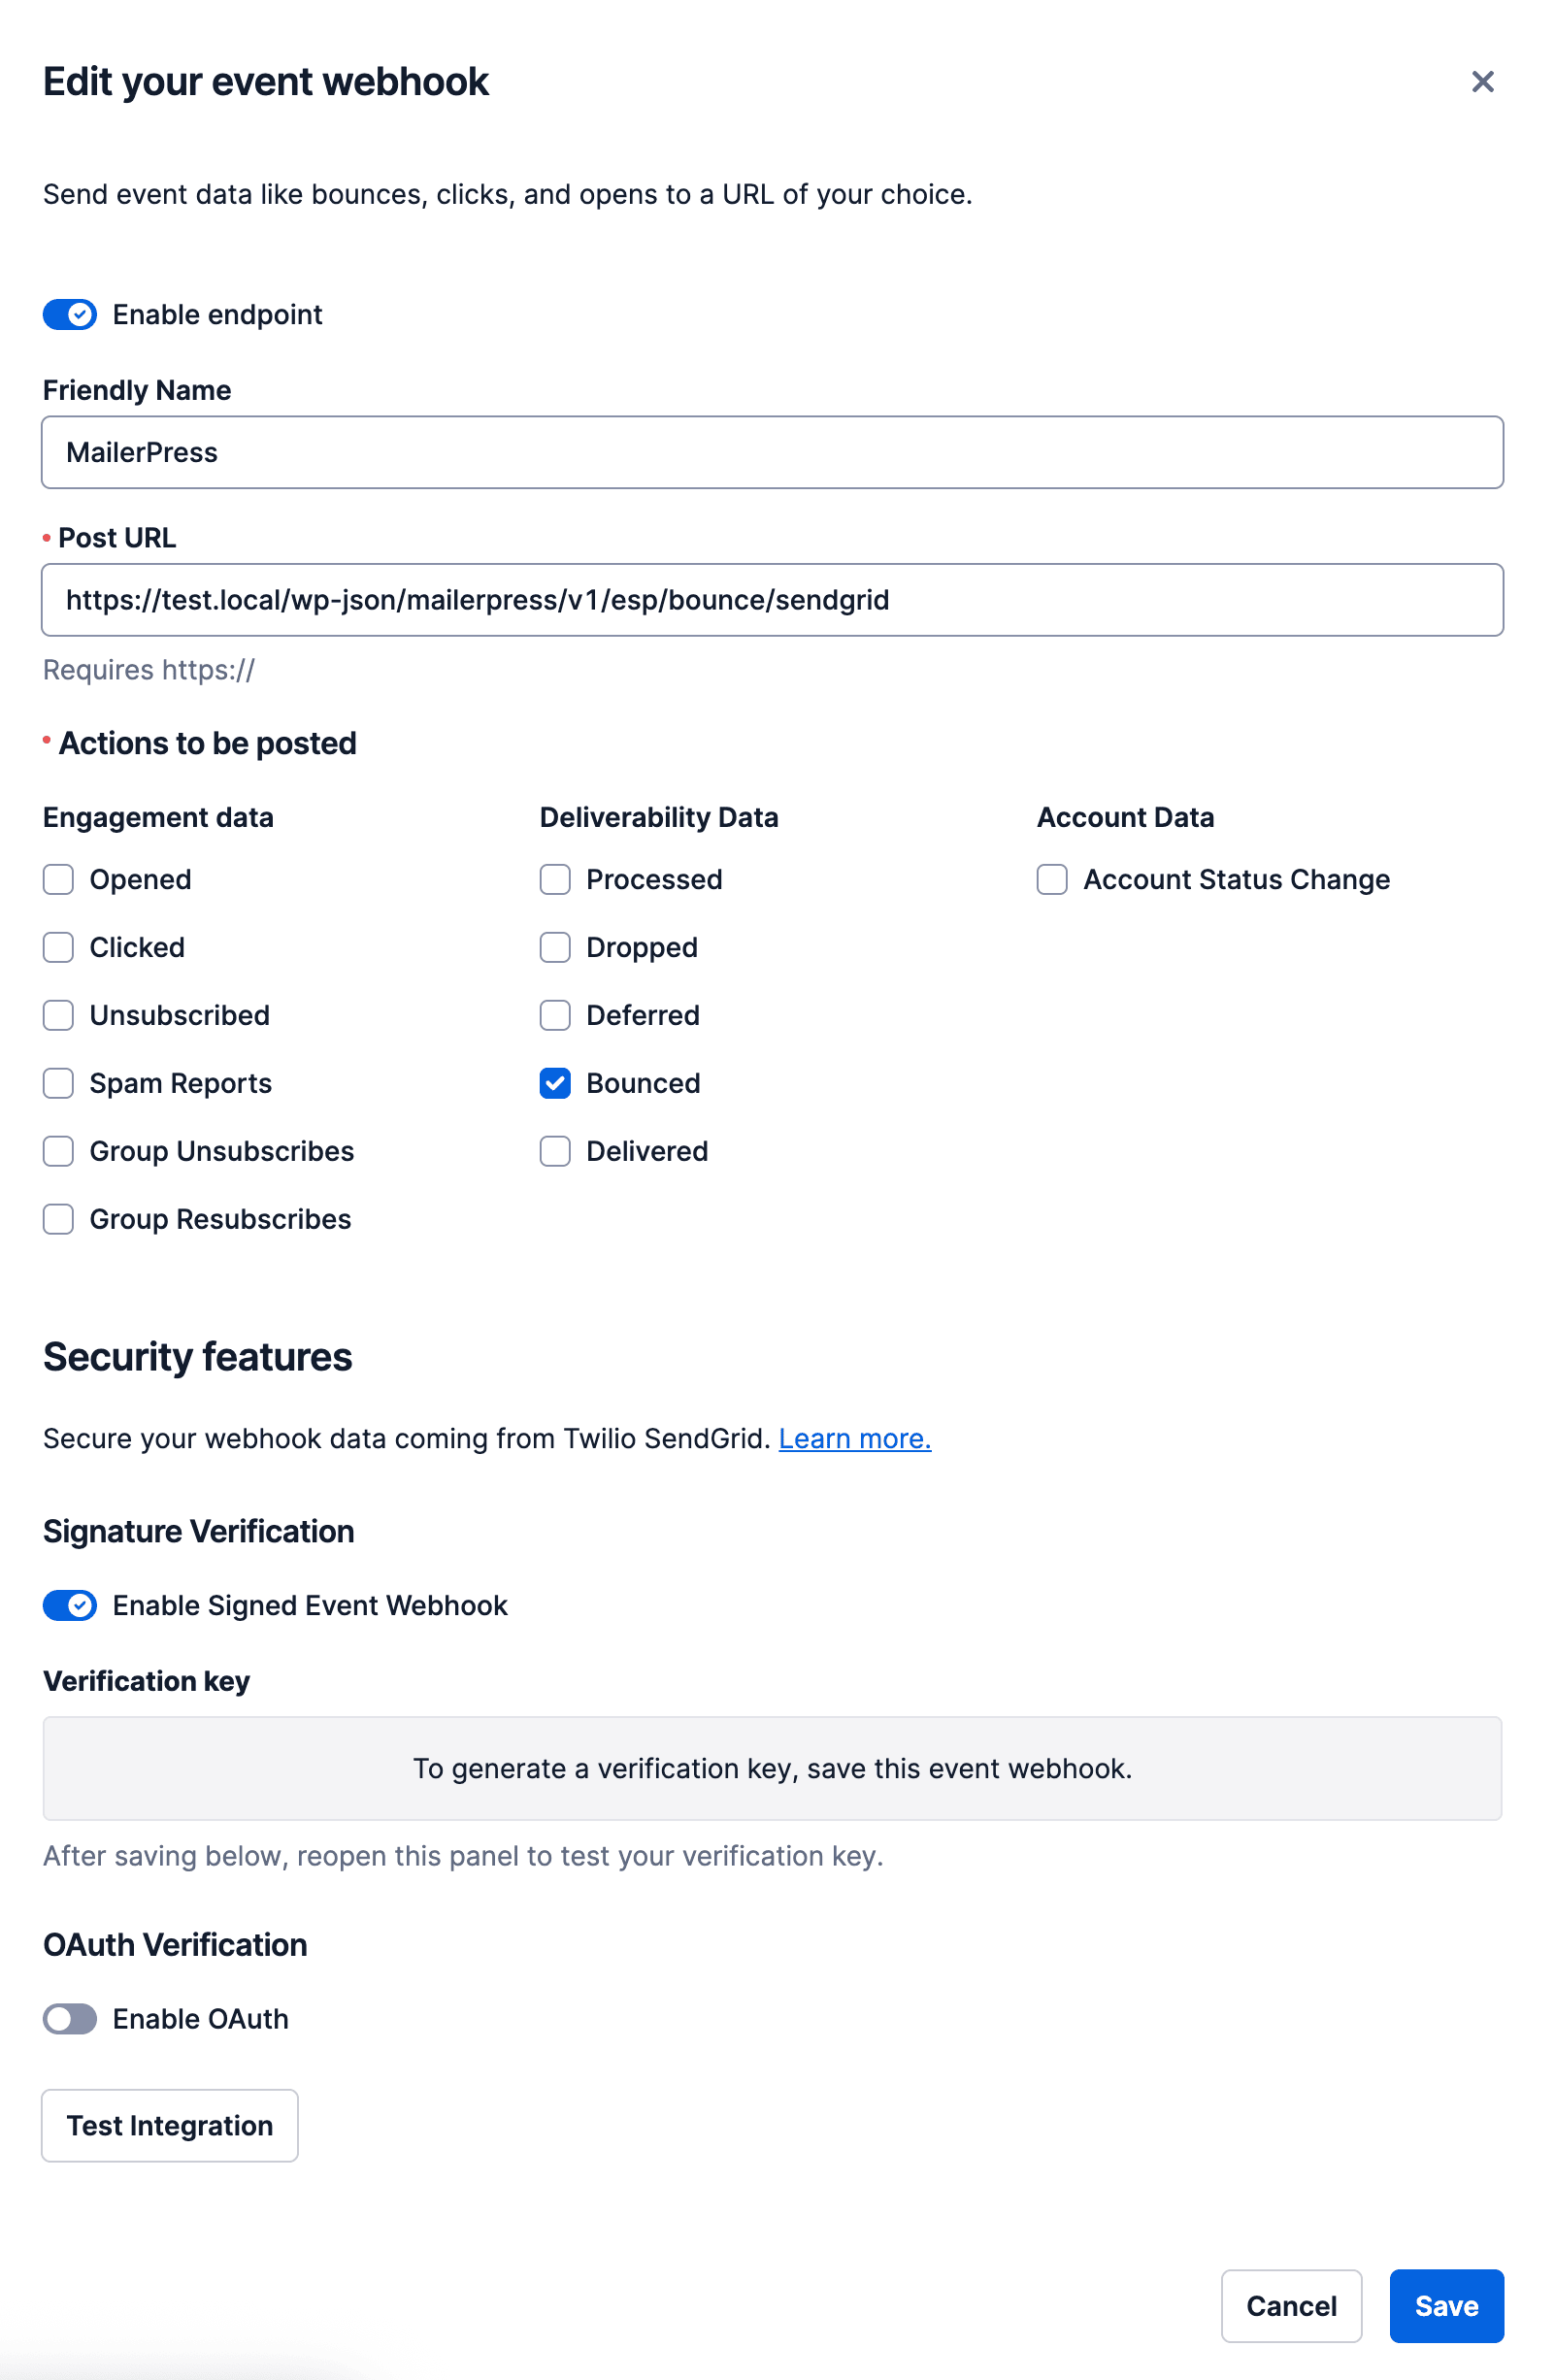
Click Save.
From the Event webhook list, edit your new webhook and copy the verification key.
Go back to your WordPress admin, MailerPress, Integrations, Email Service Providers, SendGrid (click the Settings icon from the dedicated card), and paste the verification key to the dedicated field.
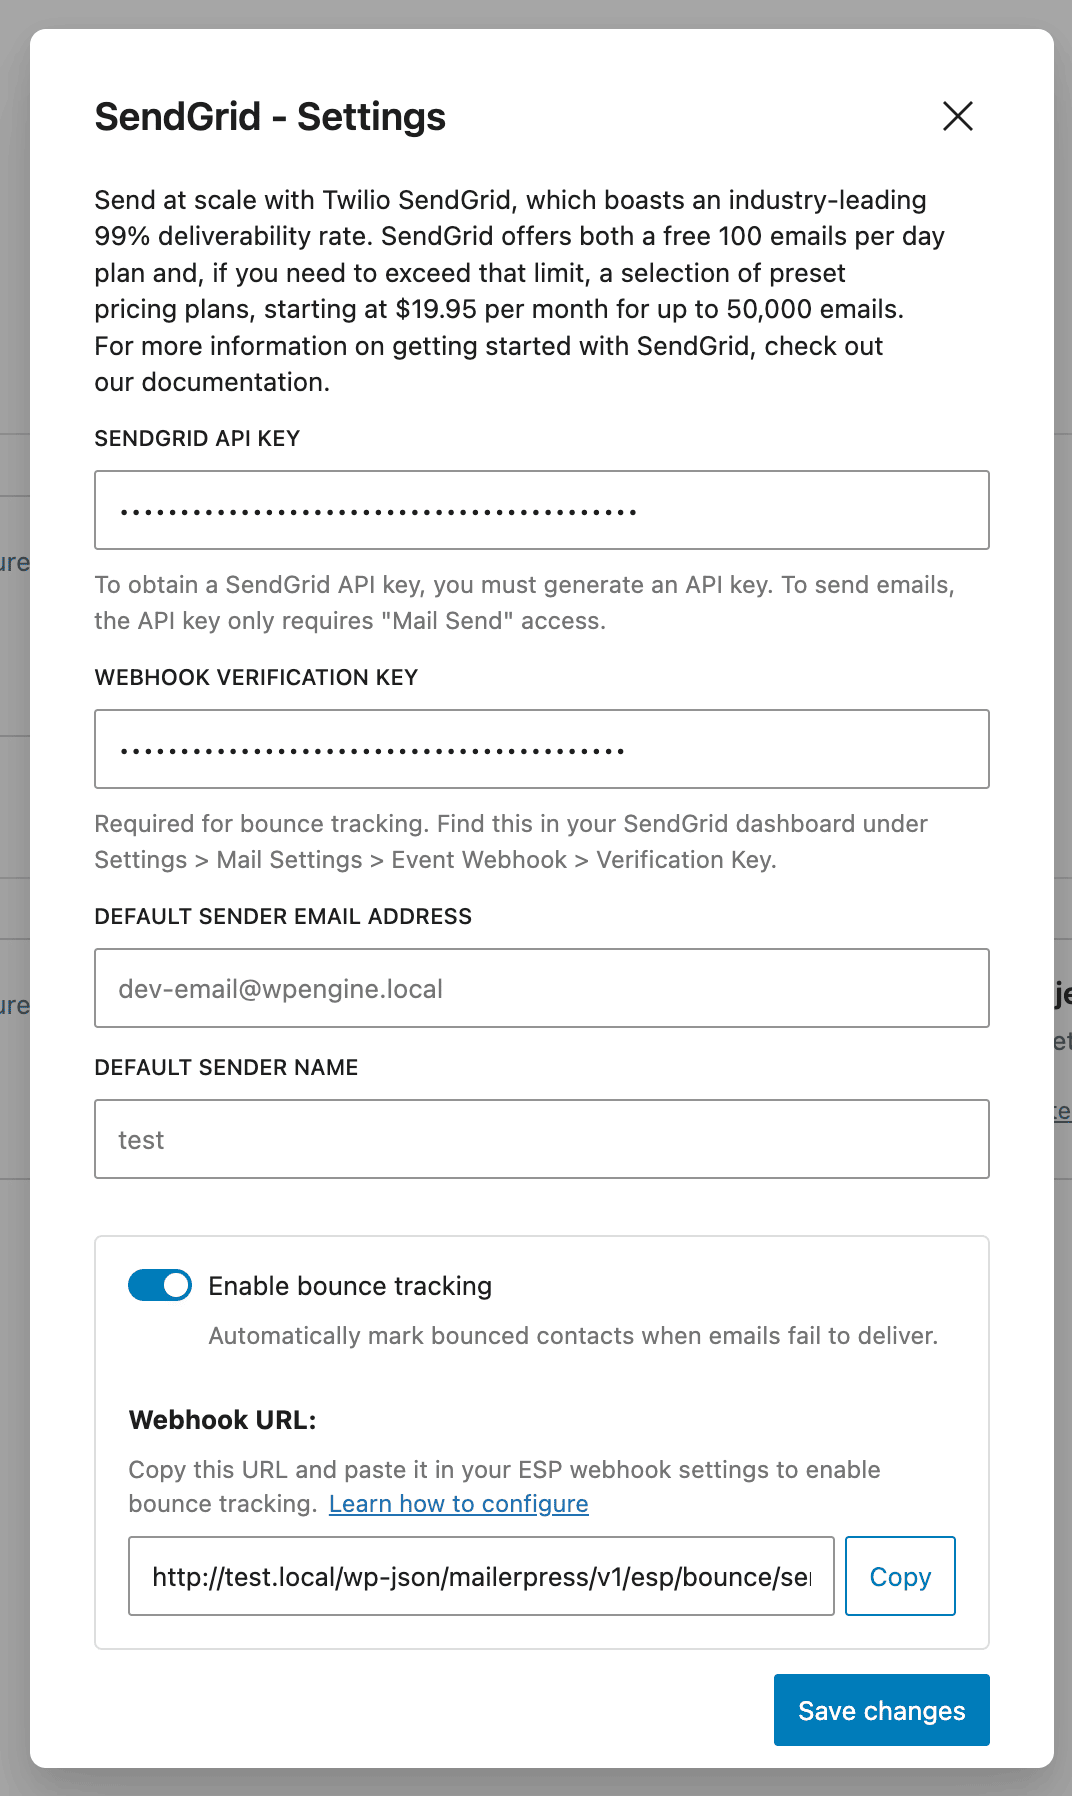
Save changes.
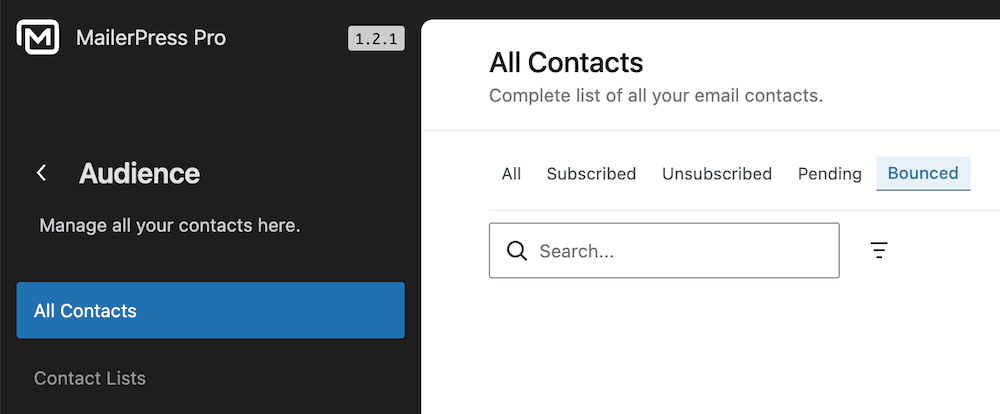
#4 – Track your bounces
Finally, go to MailerPress, Audience, and use the Bounce filter to see your bounces.